Beginnings: So, on to the campaign. It is 1702. The French have occupied all the strong points of the Spanish Netherlands in the name of Philip V, the new King of Spain. The forces of the Grand Alliance need to recover the Spanish Netherlands in the name of Charles III, the new King of Spain. They find themselves backed into the Netherlands, with any further incursions by the French being potentially disastrous.
A quick note: Marlborough the Great is played in half-monthly turns, with an event card drawn for each side at the beginning of the month.
May 15th, 1702. The Grand Alliance Army is finally collected at Nimwegan. The French opposite number is at Louvain under Boufflers. One bright note for the Alliance is that it’s army is slightly larger than the French forces opposed to it. The first priority is to eliminate a couple of French-held fortifications on the right bank of the Rhine, thus denying the French easy crossings of the river. Therefore the army moves down the left bank of the Rhine to besiege Geldern. A sufficient force (3 strength points) are used to besiege the town while the rest of the force finds a defensive position just to the west, facing the French-held fortification of Venlo on the Maas river (the most logical French crossing-point.)
Boufflers has a decision to make. He can:
- Sit in the Lines of Brabant and do nothing;
- Sit in the Lines of Brabant and do nothing;
- Immediately move to break the siege;
- Move to threaten the siege forces and their communications;
- Besiege Maastricht in turn, prompting the Alliance to counter it;
- Leave troops in the Lines of Brabant and besiege Huest;
- Leave troops in the Lines of Brabant and besiege Bergen-op-Zoom.
Having an initiative of 1 in the game, he adds that to his die roll. The resounding roll is a 1, which means he does nothing.
June 1st, 1702. This being the beginning of the month, event cards are drawn for both sides. Neither has an outside event that effects his situation.
Encouraged by the inaction of his opponent, the Alliance commander determines to leave the besieging forces in place and move to invest and besiege Venlo as well. Leaving Ginkel in charge at Geldern, he moves Netherlands forces under Overkirk to blockade the east side of Venlo while he moves his British and Prussian forces to the left bank of the Maas to cover the two sieges.

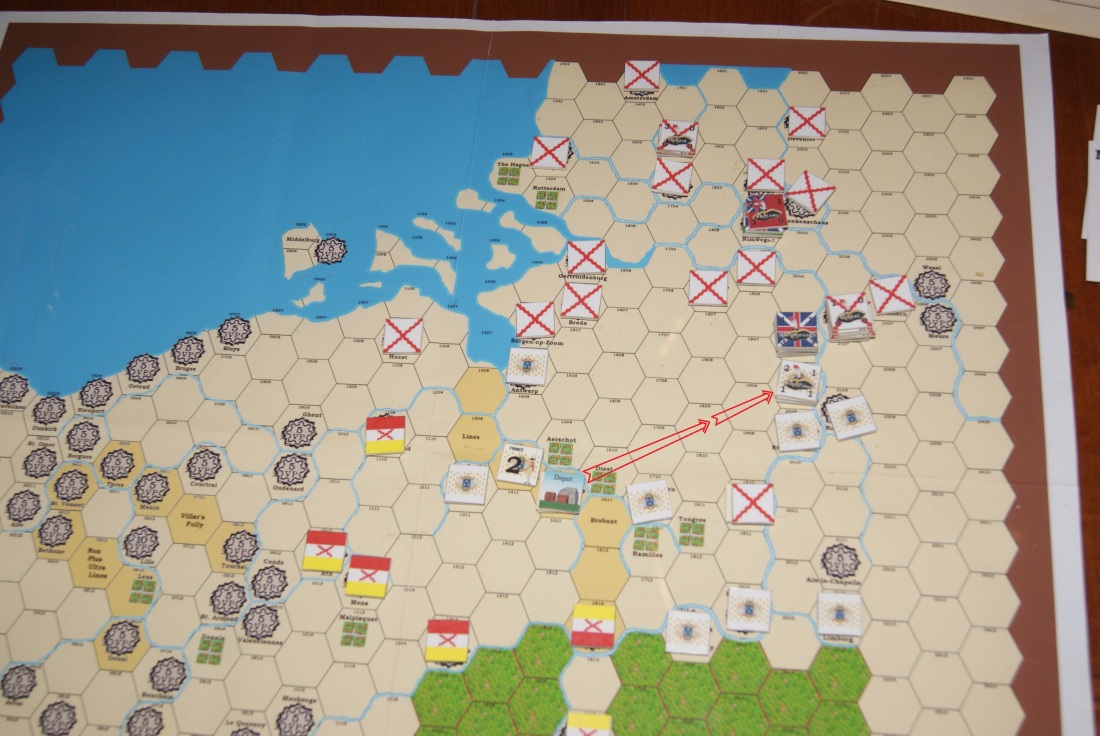
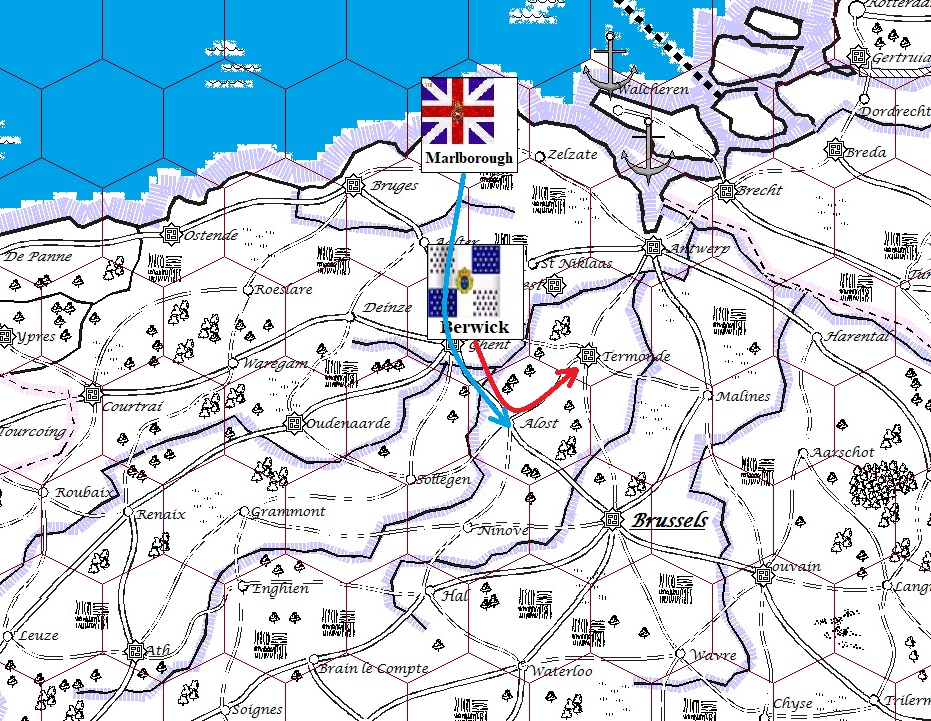
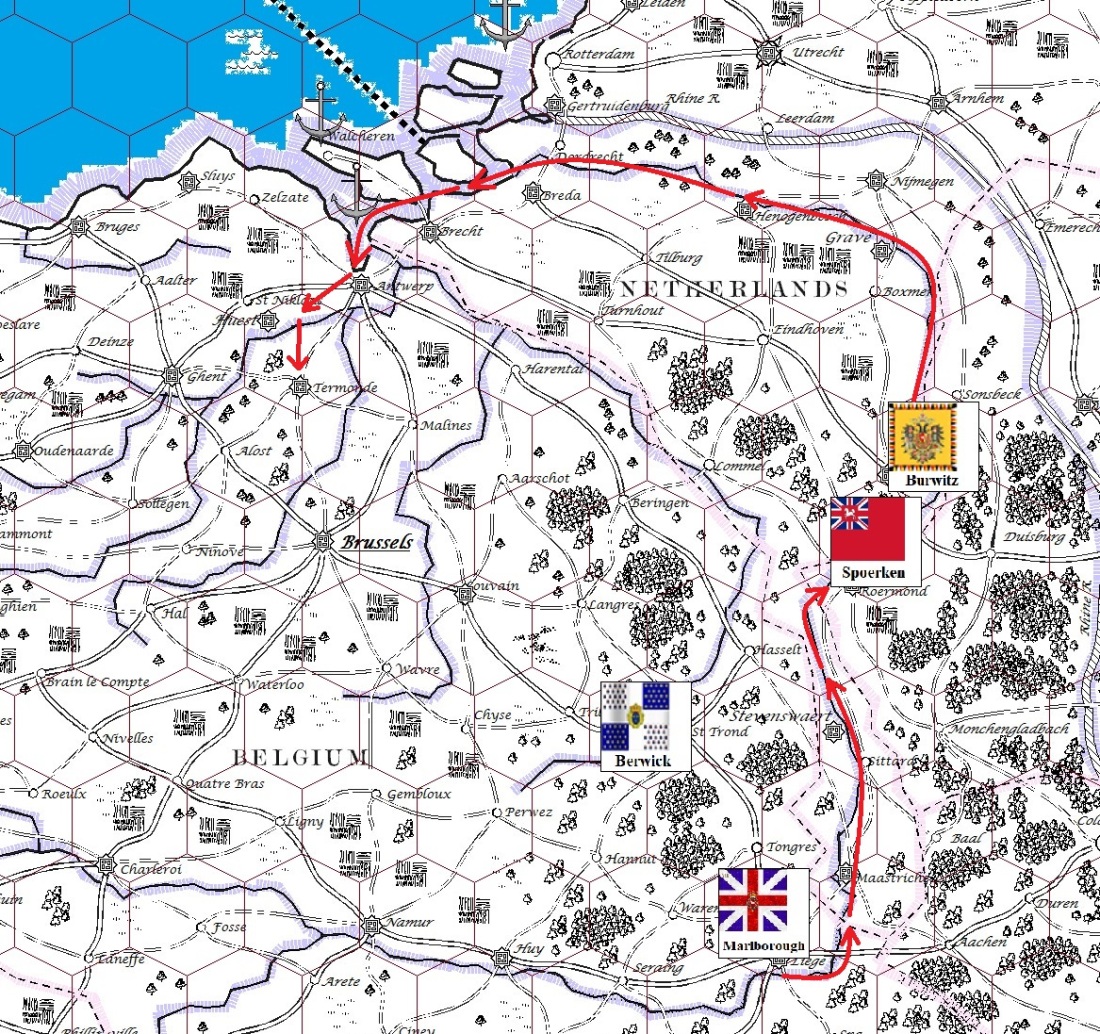
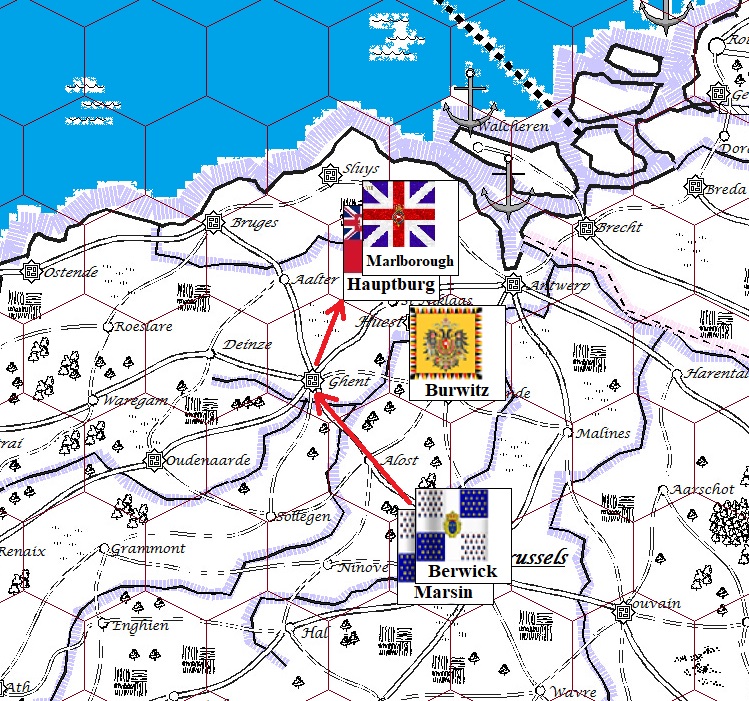
The campaign map showing mostly the Spanish Netherlands. Dark grey circular marks are fortifications. The three near the right-hand edge are neutral. The green areas are the forested rough terrain of the Ardennes. Boufflers’ counter is on the stack just to the right of center. Marlborough and his army is the dark union jack counter near the upper right corner.
Boufflers is now being prompted from Versailles to do … something. He decides he has the following options:
- Sit in the Lines of Brabant and do nothing;
- Sit in the Lines of Brabant and do nothing;
- Leave troops (2 SP) in the Lines of Brabant and move to break the siege;
- Leave troops (1 SP) in the Lines of Brabant and move to break the siege;
- Leave troops (2 SP) in the Lines of Brabant and move to threaten the siege forces and their communications;
- Or more: Leave troops (1 SP) in the Lines of Brabant and Besiege Maastricht in turn, prompting the Alliance to counter it.
The resulting die roll, with modification, is: 5
June 15th, 1702: At first call, the isolated garrison of Geldern abjectly surrenders. Ginkel moves to take over the siege of Venlo, bringing the besieging forces from Geldern (minus the new garrison) to the siege. He provides no reinforcements for Marlborough’s covering force.
Boufflers’ options:
- Assault the covering force;
- Move forward threateningly;
- Move to besiege Grave.
Option 2 is taken. Boufflers positions himself between the Alliance covering force and Stevenswaert, less than 10 KM from the enemy.

Boufflers moves his army out from Louvain in a threatening manner, then moves in between Stevenswaert and Marlborough’ army covering the siege. Finally he moves North to the attack.
July 1st, 1702: Time to see how outside forces may affect this campaign: The French forces are not affected, but Marlborough is required to send forces to defend against a perceived threat against Hanover. He dispatches his Hanoverian troops and his Hessian mercenaries. The Alliance maintains its position.
Boufflers’ options:
- Retire into Stevenswaert;
- Stay where he is;
- Attack.
Possibly influenced by complaints from Versailles, (or rolling a 6) Boufflers moves forward into the attack.
The Alliance forces are not dug in, but Marlborough has chosen a good position. He is situated on a ridge. His left is on the Maas river and his right is protected by the Grauffert woods. In front of him runs a small stream.
The Battle of Venlo
The French have 8 strength points coming into the battle. The problem here is that I don’t have 800 points worth of French units. What I do have are 11 battalions at 24 points each (264 points); 4 regiments of cavalry (120 points); and four batteries of artillery (40 points), or a sum total of 424 points.
As the Alliance forces have 7 strength points, they are going to have to come in at less than that. 424 * 7/8 = 371 points. Thus the Alliance forces will be composed of 10 battalions of infantry (240 points); 4 batteries of artillery (40 points); plus 3 regiments of cavalry plus 1 squadron (96 points.)
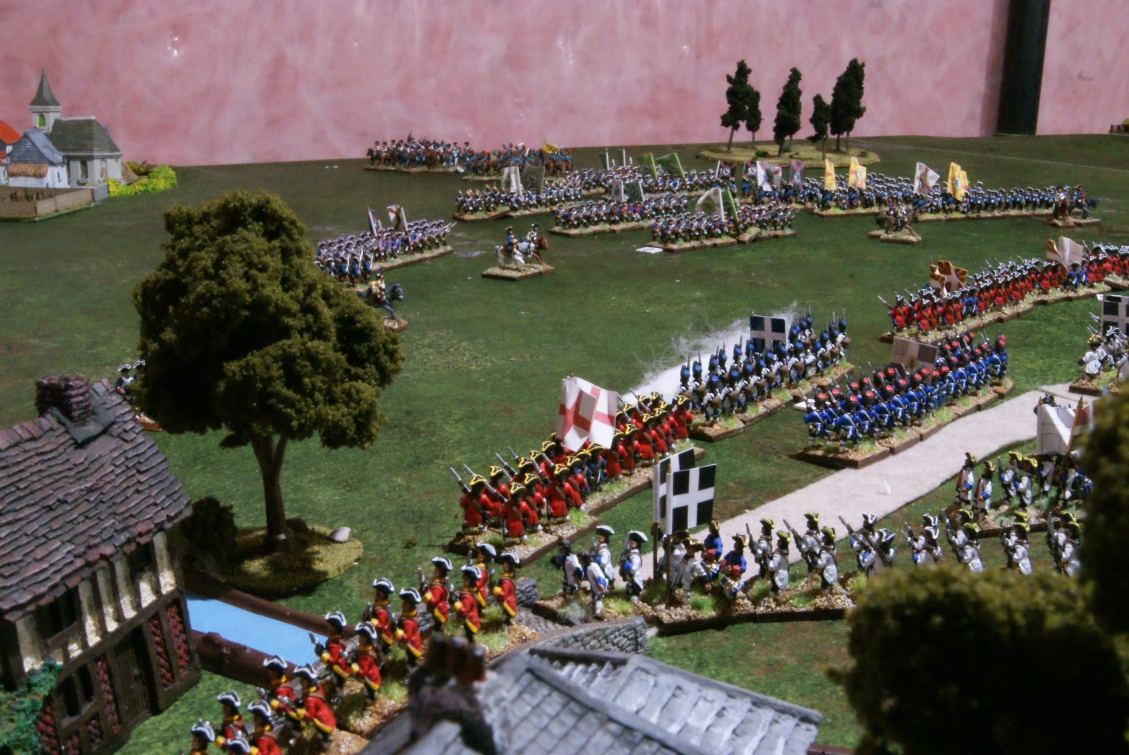
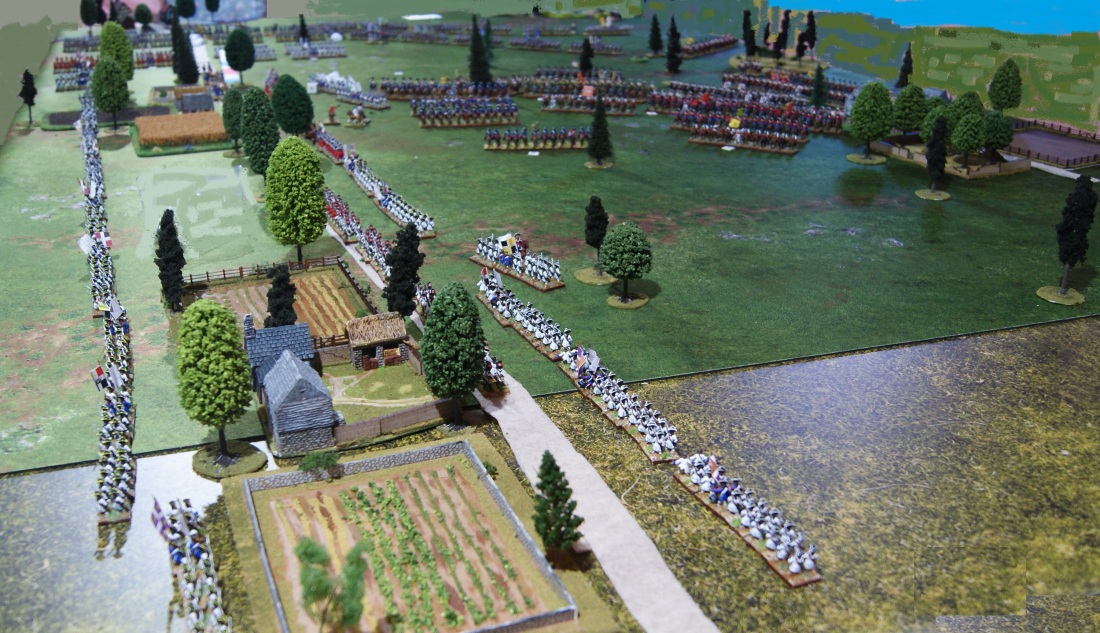
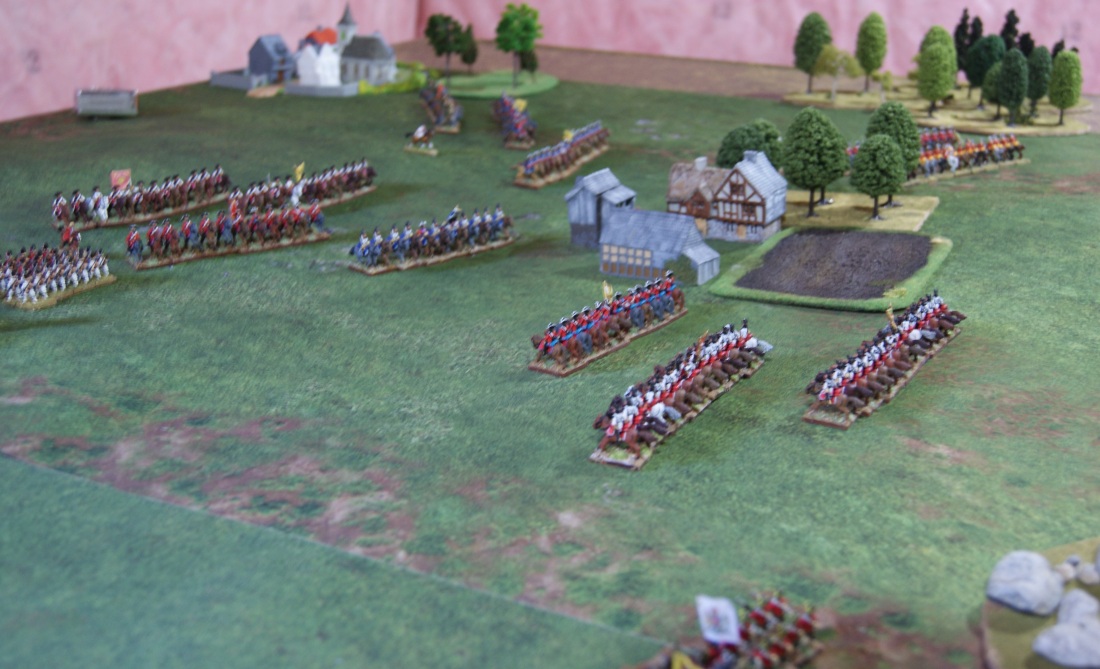
The British drew up 5 battalions and two batteries on the right of the line along an east-west ridge running from the Grauffert Woods down to the Maas river. Two battalions are up front with the artillery, with two more in support and a fifth one in reserve. The Prussians drew up on their left with two two-battalion regiments side-by-side with artillery in between. Up forward a fifth Prussian battalion has occupied the farmhouse and small barn. No one is in the farmer’s field or the orchard. The cavalry was concentrated on their weaker left flank, with the Prussian heavies up front.
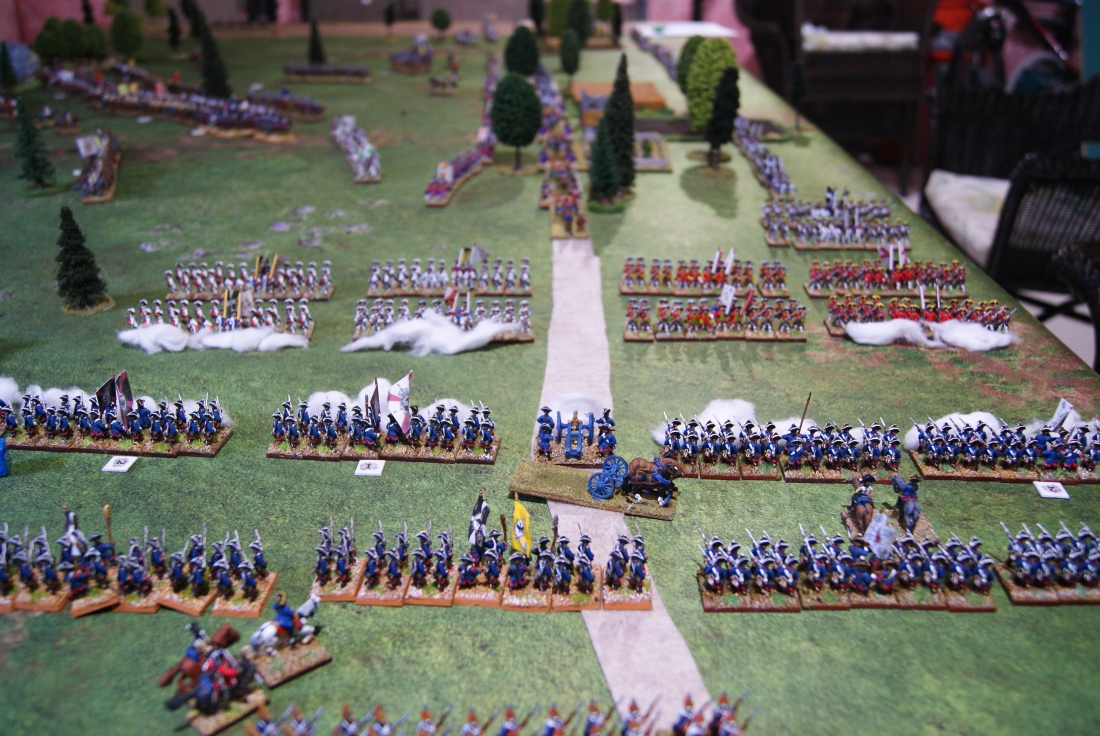
The French drew up in four brigades of infantry with artillery interspersed. They occupied a smaller ridge to the south of the stream. A brigade of cavalry bolstered either flank.

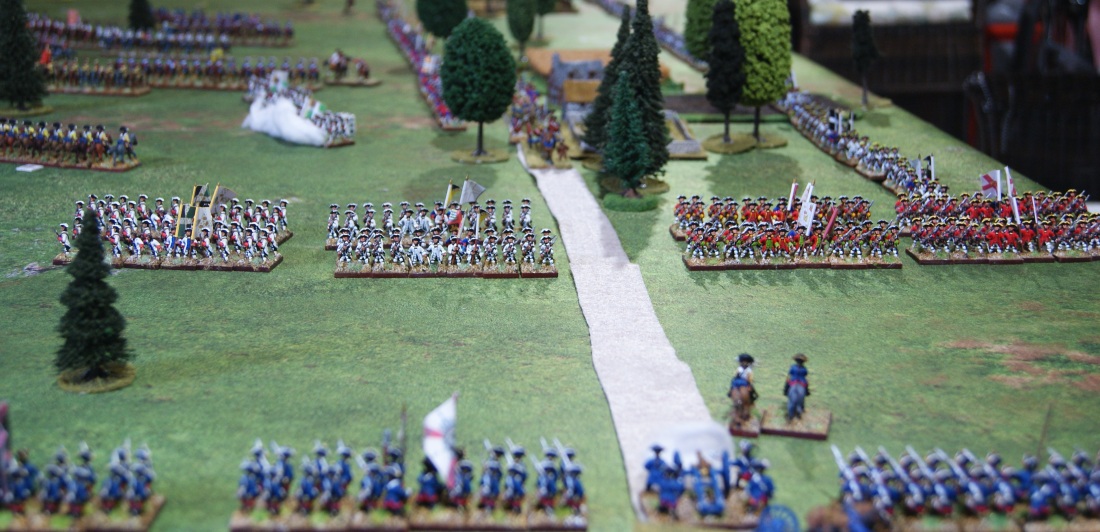
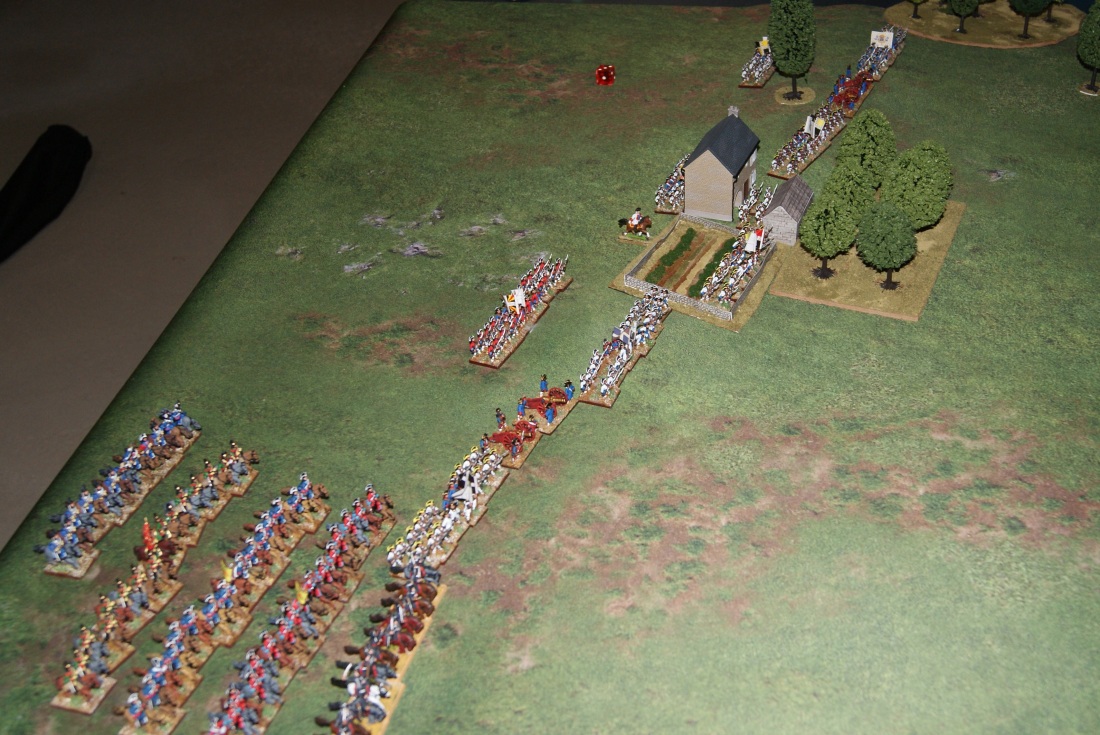
Field and initial starting points for the Battle of Venlo. British forces are in red, Prussian in blue and French in white. The two colours of brown indicate the approximate location of the two ridges on either side of the stream. Stream in blue. Farm house and barn in two-tone grey. Road in grey. Orchard is dark green dots, while wheat field is beige.
The Alliance troops need to hold this position. It is the best defensive spot between here and Venlo, about 4 English miles north of here. The French objective is to get them off the ridge and open up the road to Venlo. If they can do this the siege is broken.

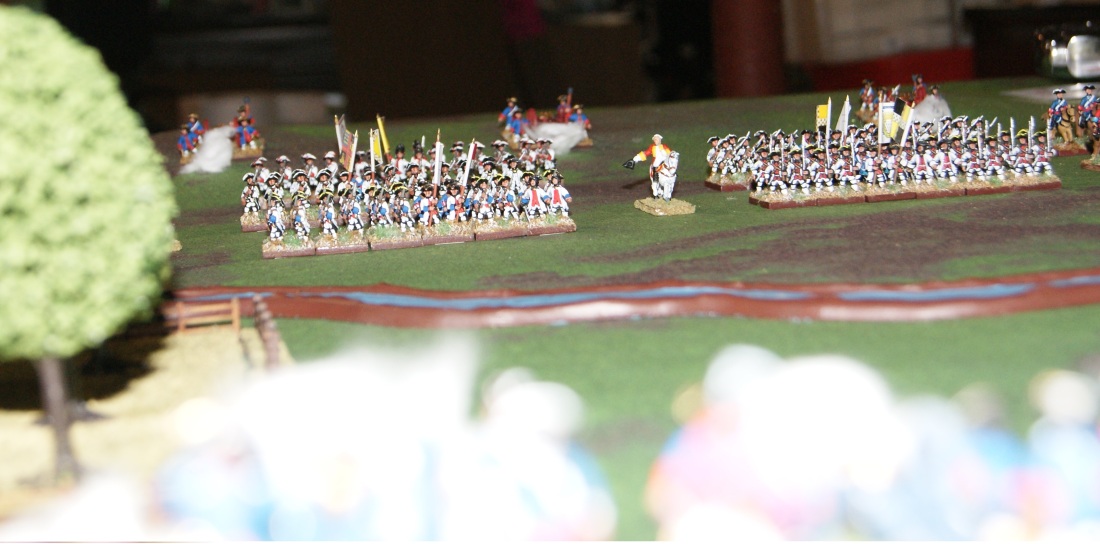
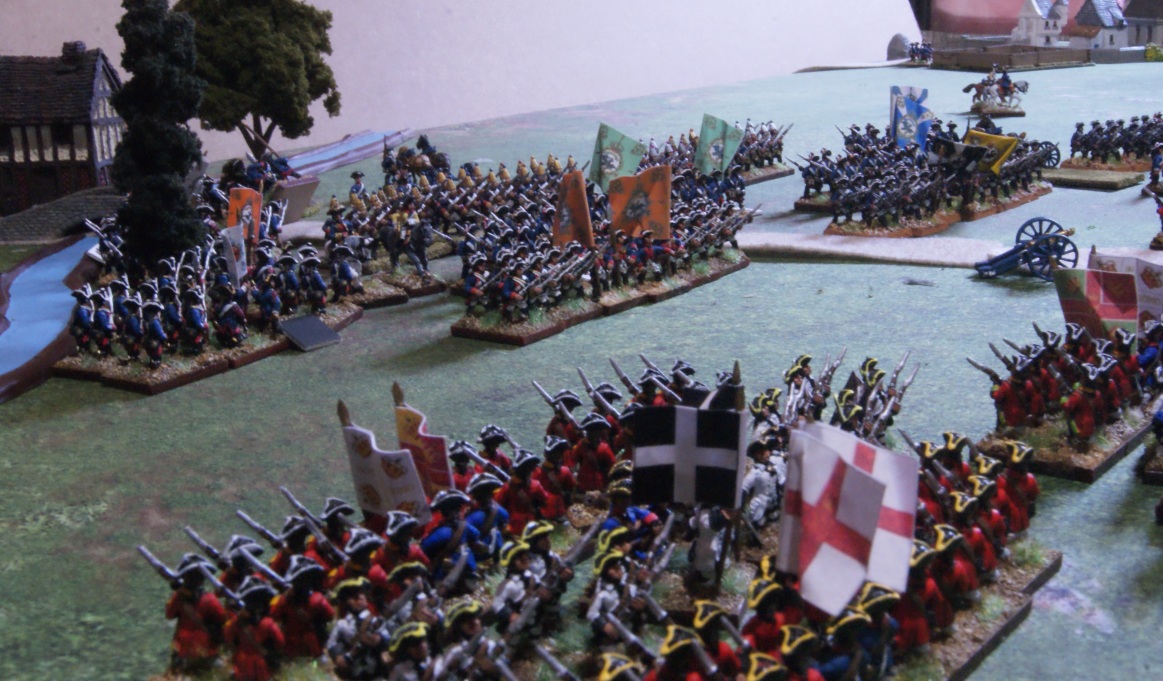
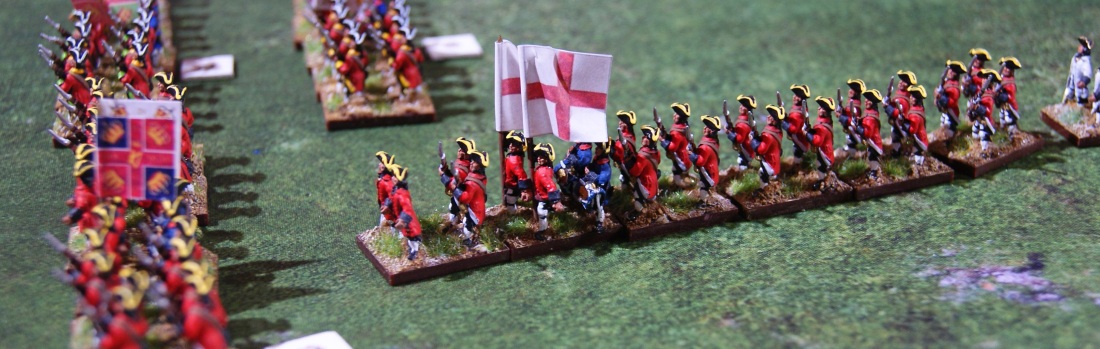
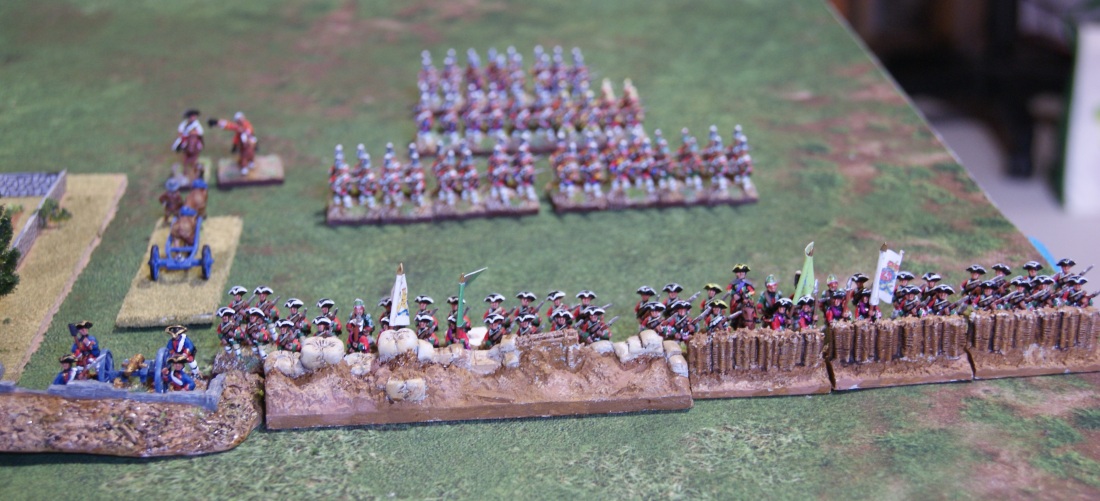
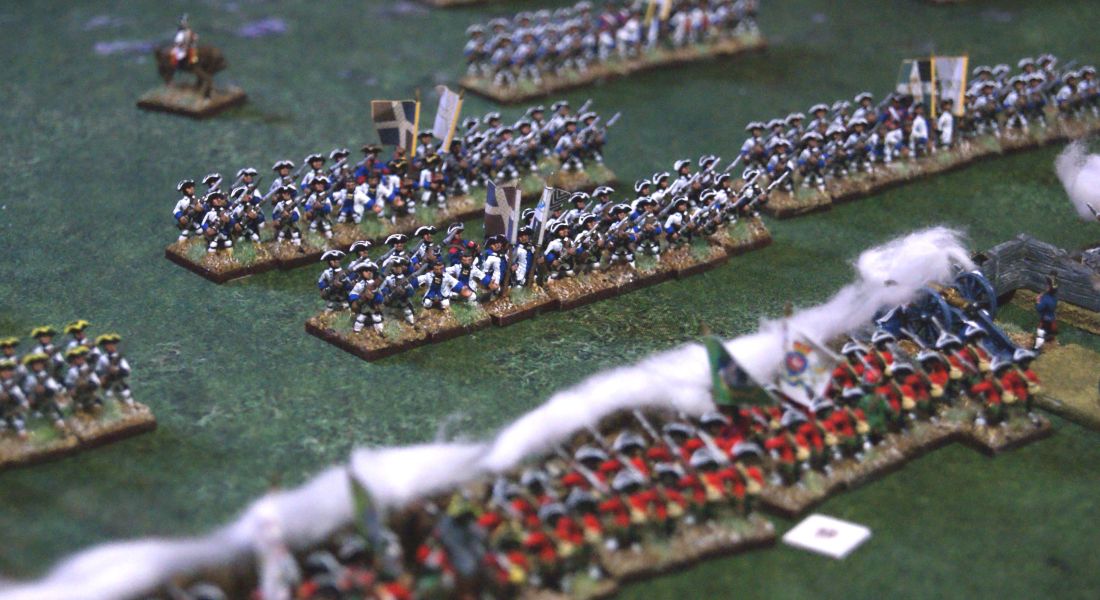
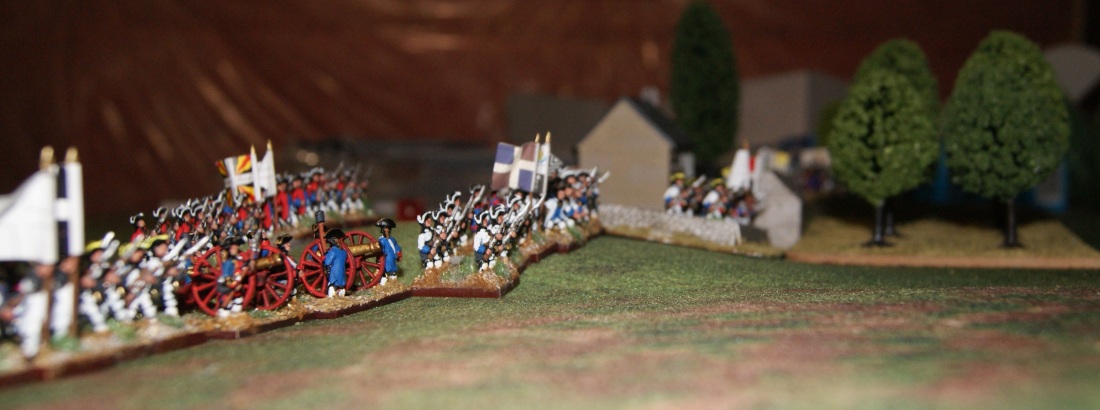
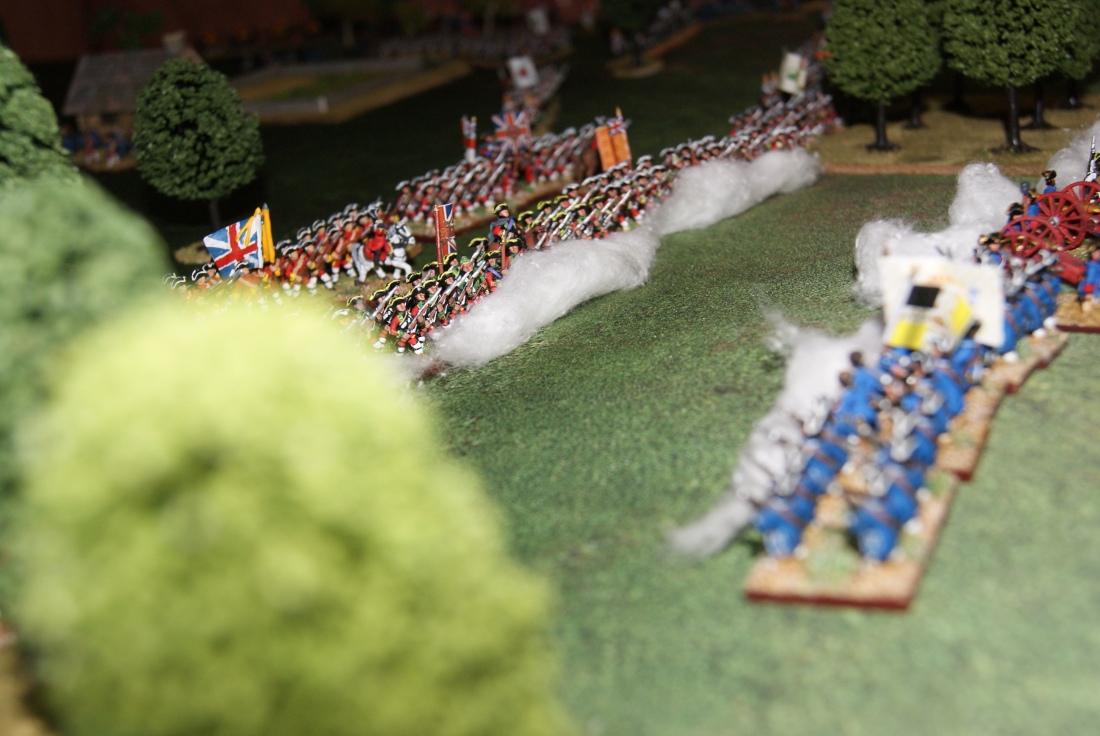
The English force of five battalions and two batteries, with the Prussians peeking out on the right. The view is from above the French position.
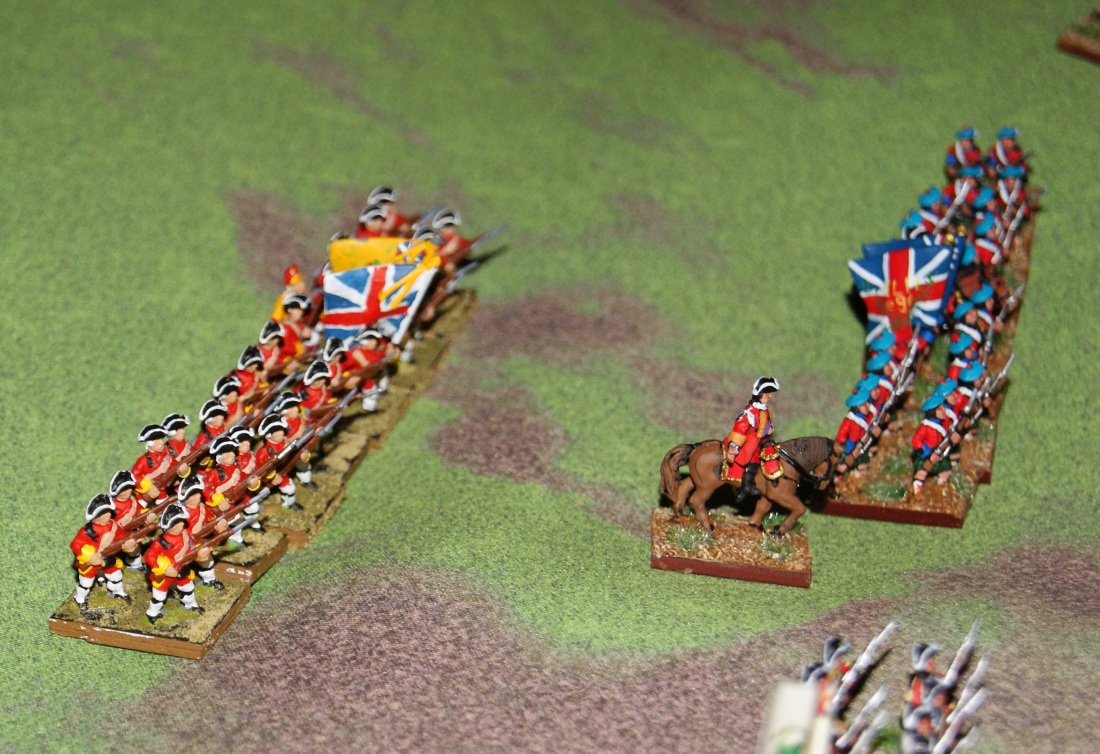
The 42n Highland battalion on the right with the 44th Reg’t of Foot drawn up in support.

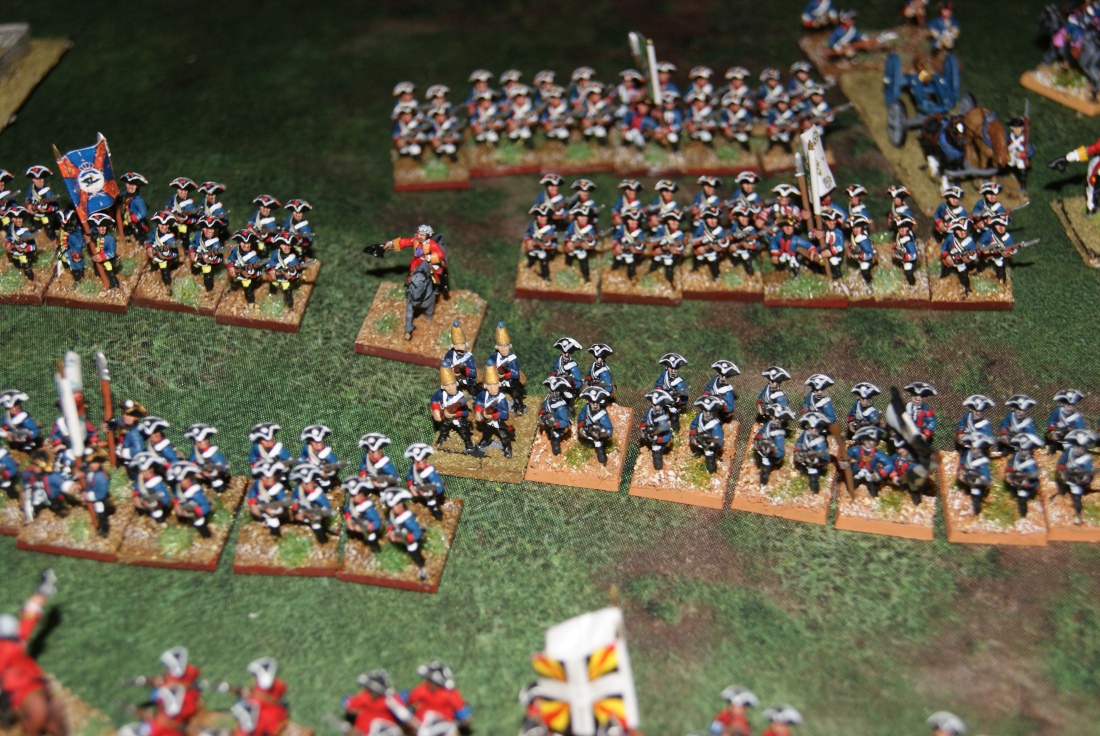
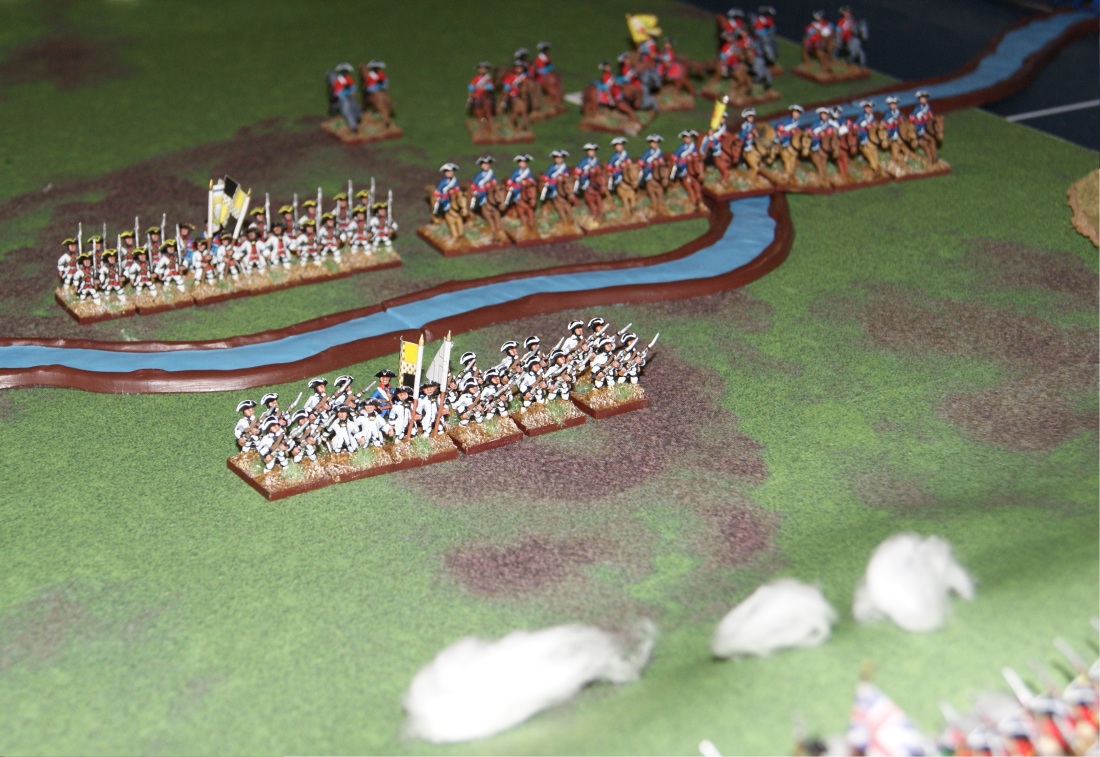
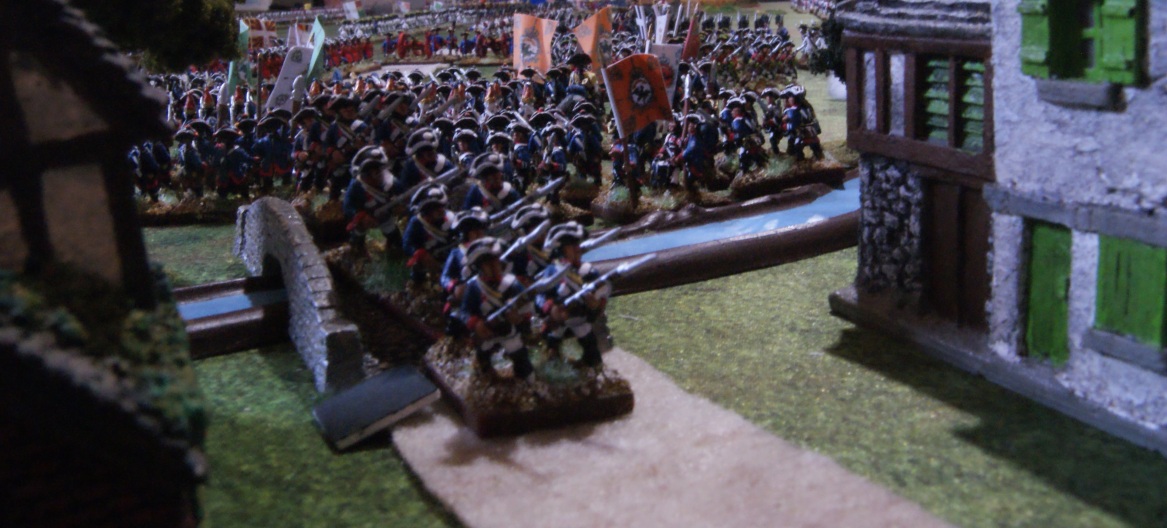
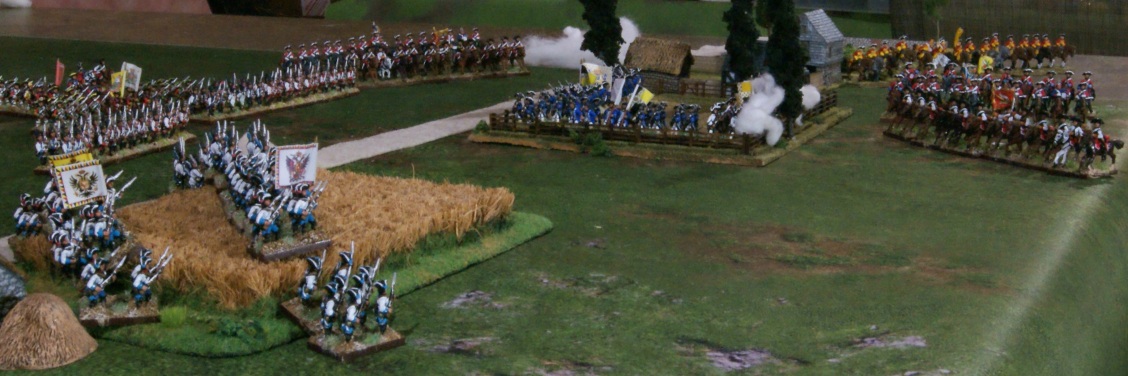
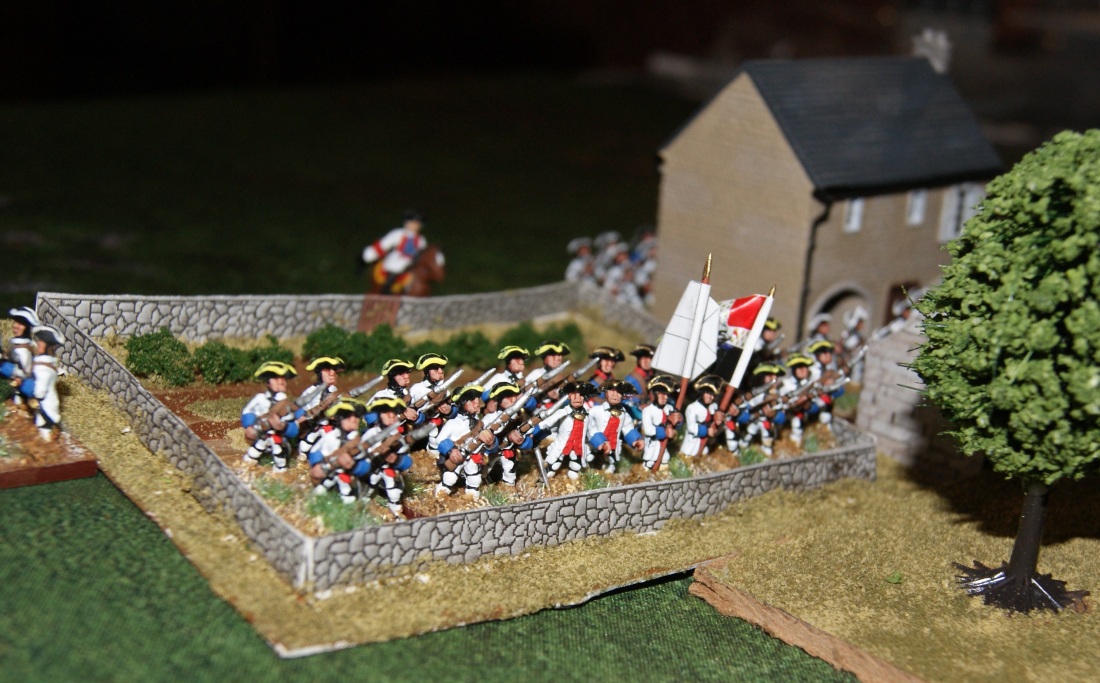
Prussian troops on the ridge, with the occupied farmhouse and barn in the foreground.
An ariel view of the Prussian Anhalt-Dessau Regiment Nr. 3, flanked by artillery batteries.

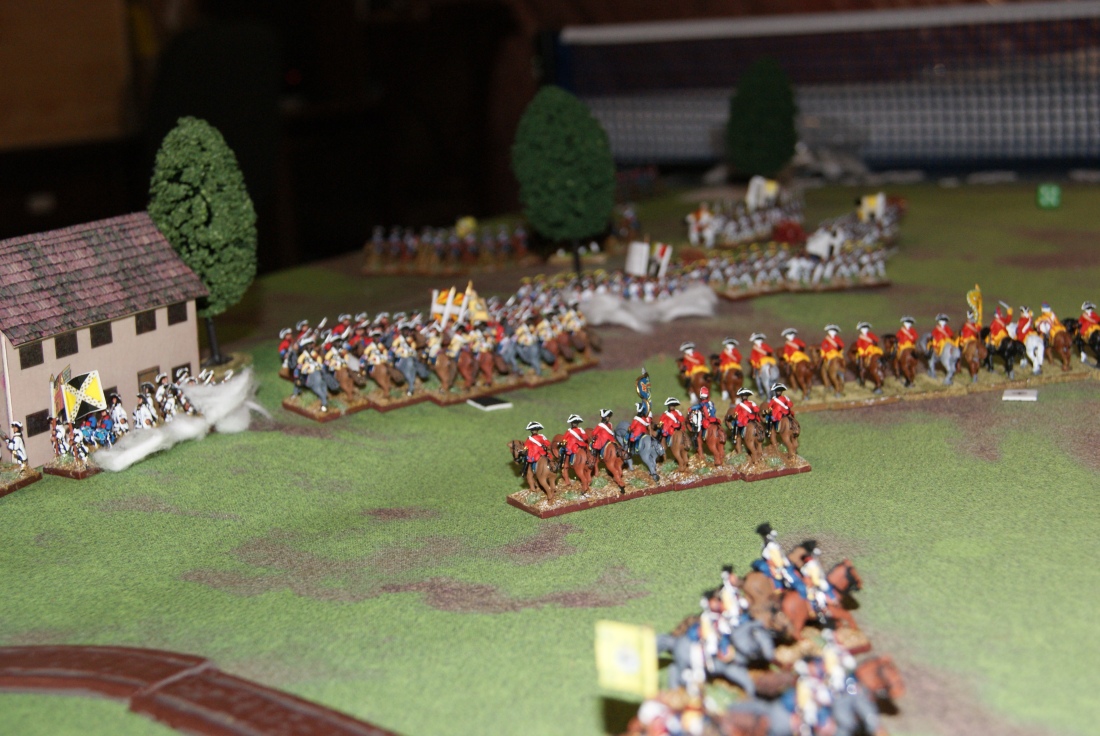
Boufflers waves his plumed hat and the whole French line rolls forward. The artillery stops moving before they leave the ridge so that they can open up – rather ineffectively, it would seem – on the Alliance position.
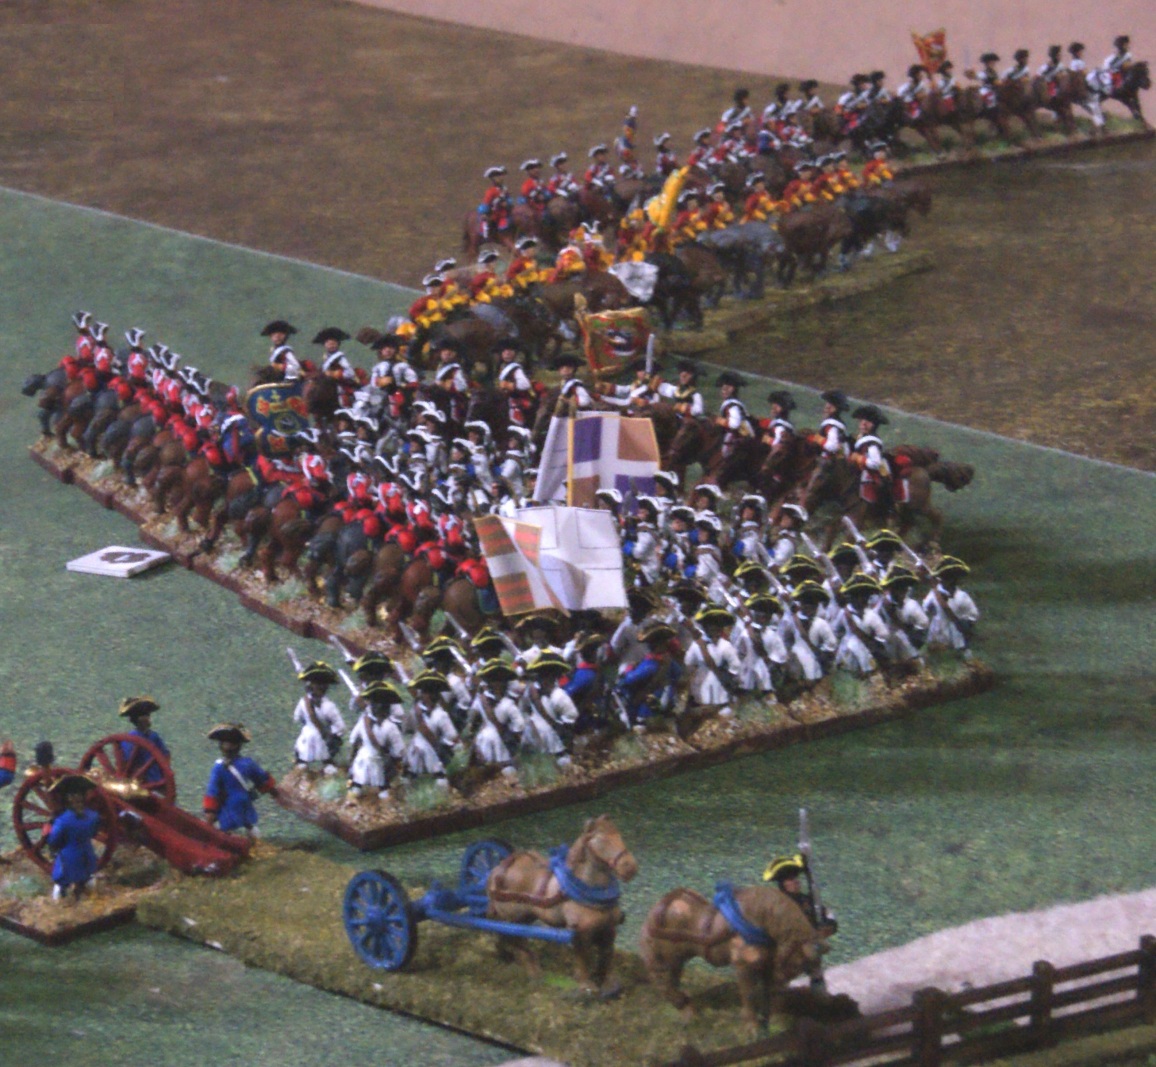
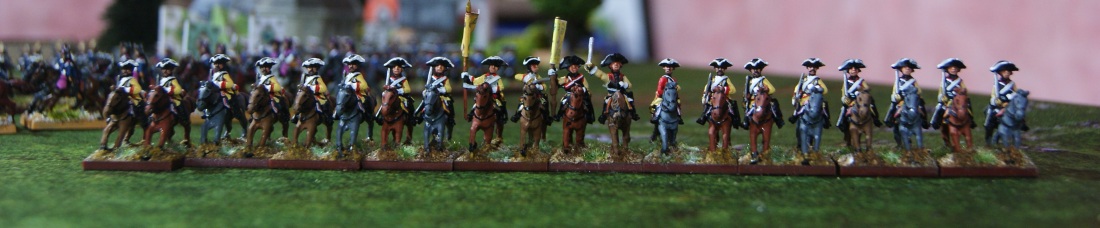
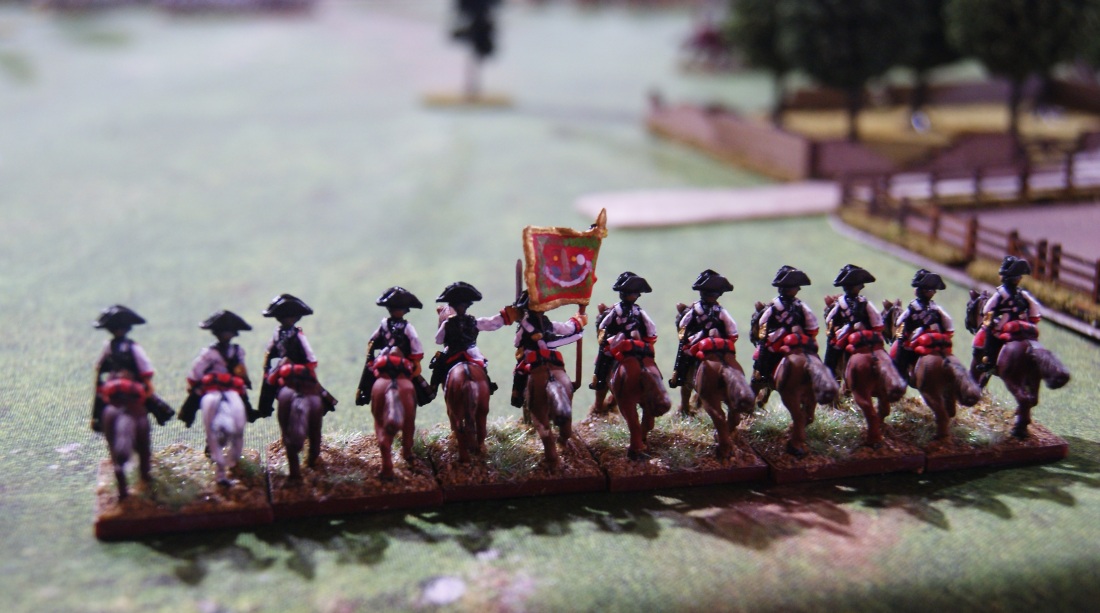
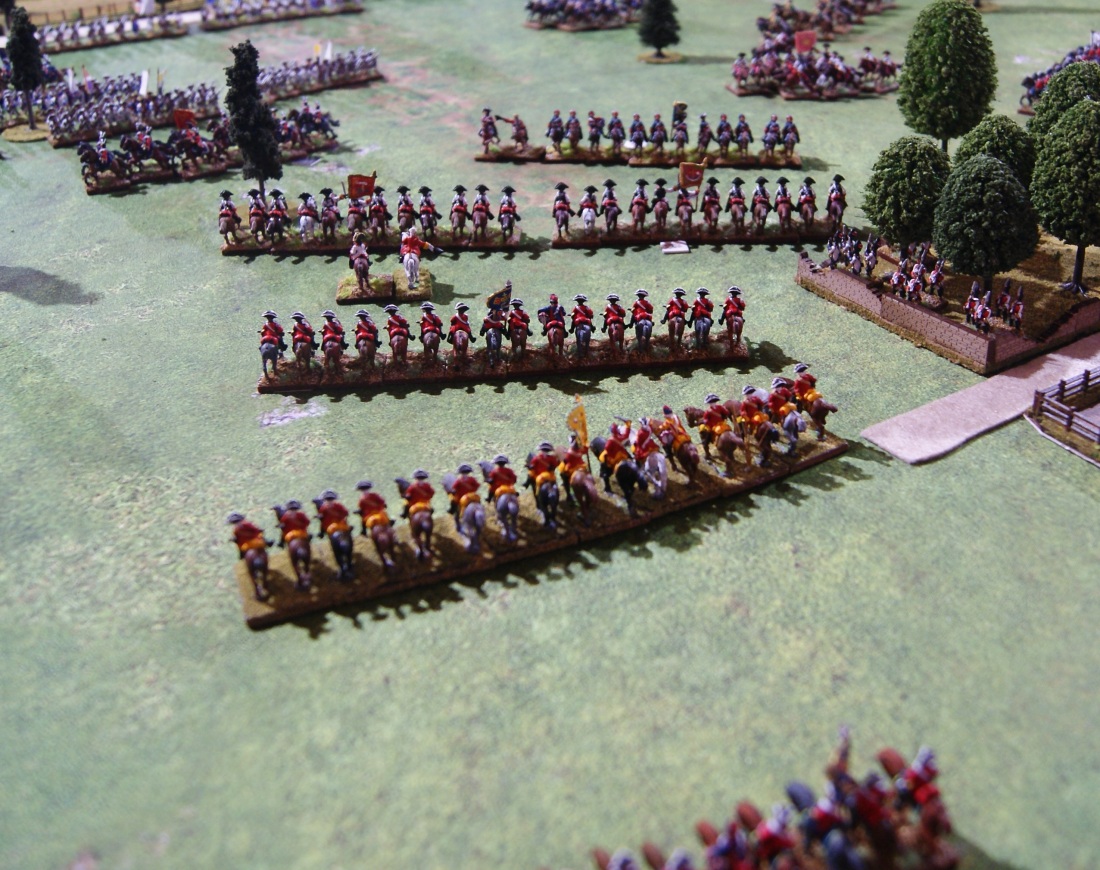
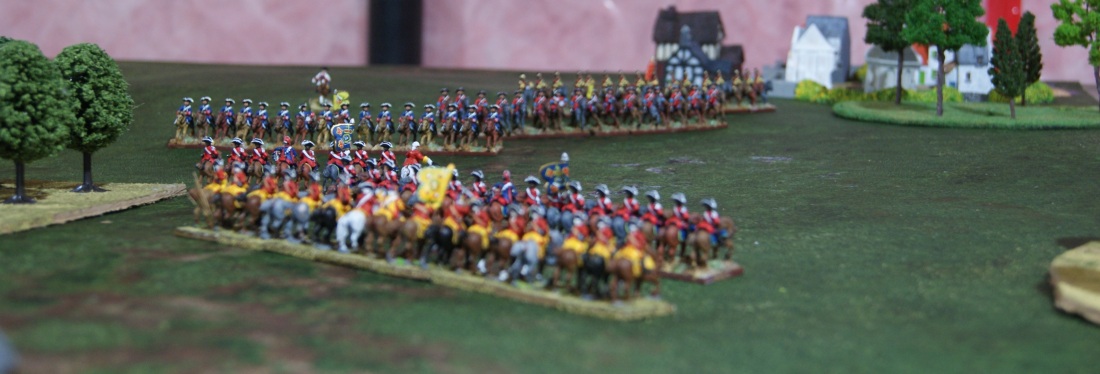
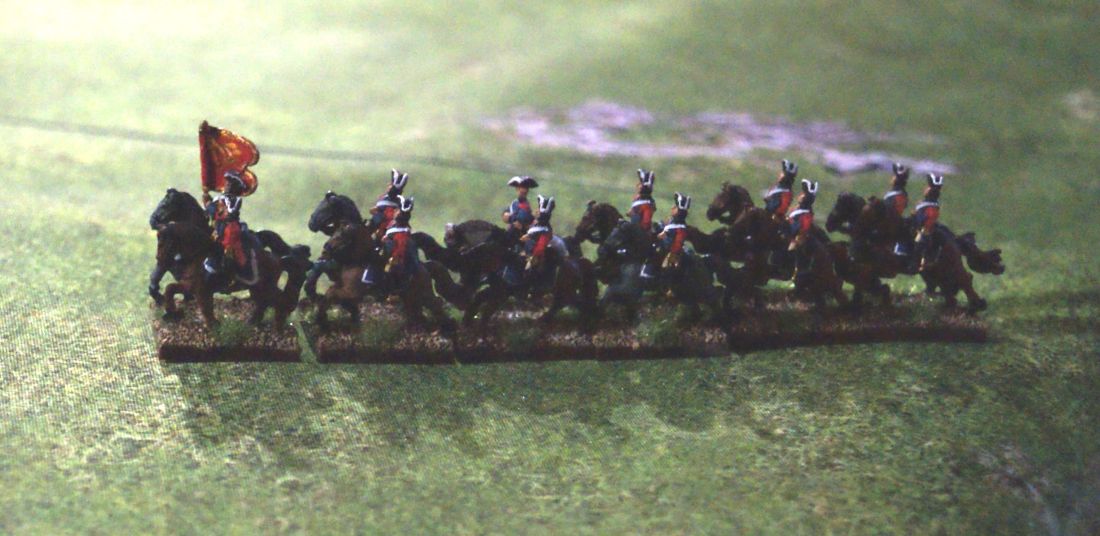
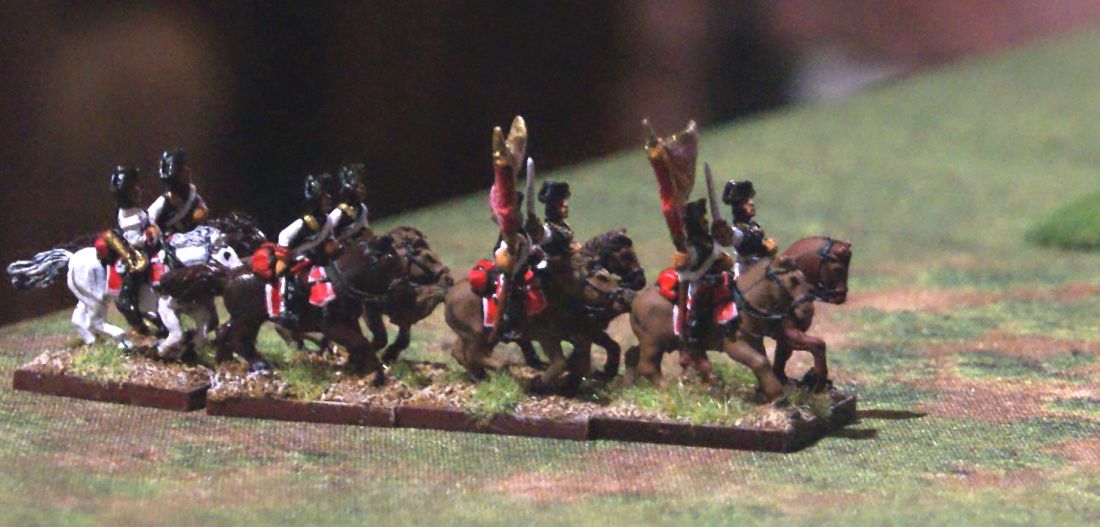
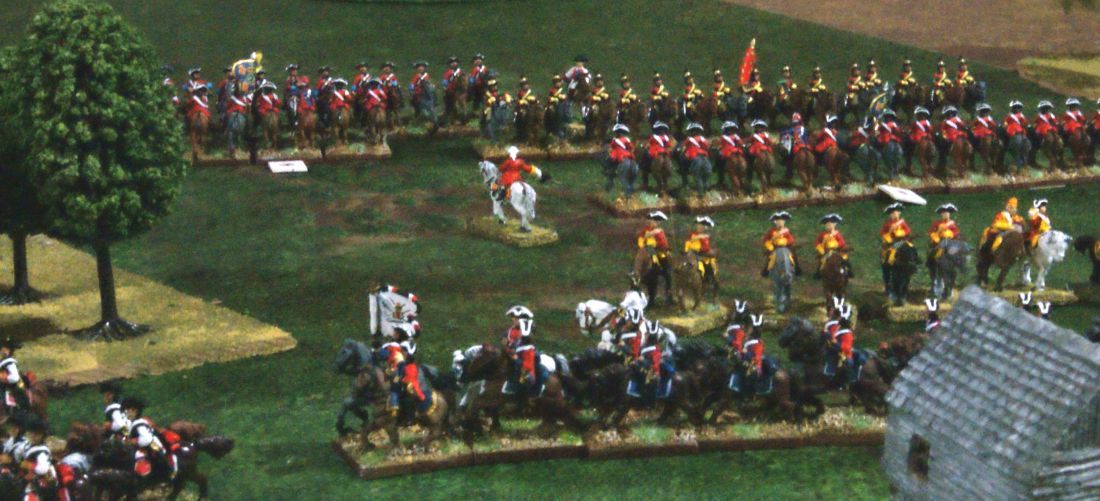
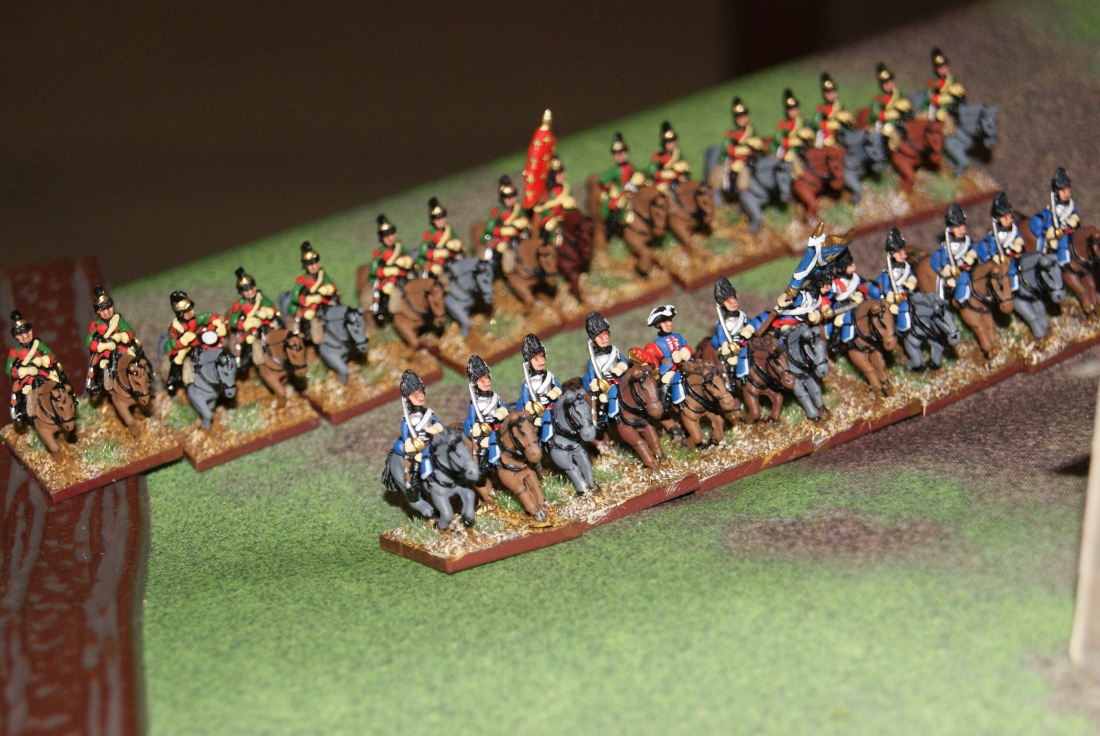 The French right flank cavalry brigade, seen before the action commenced. The Royal Allemande leads, with the Schomburg Dragoons in support.
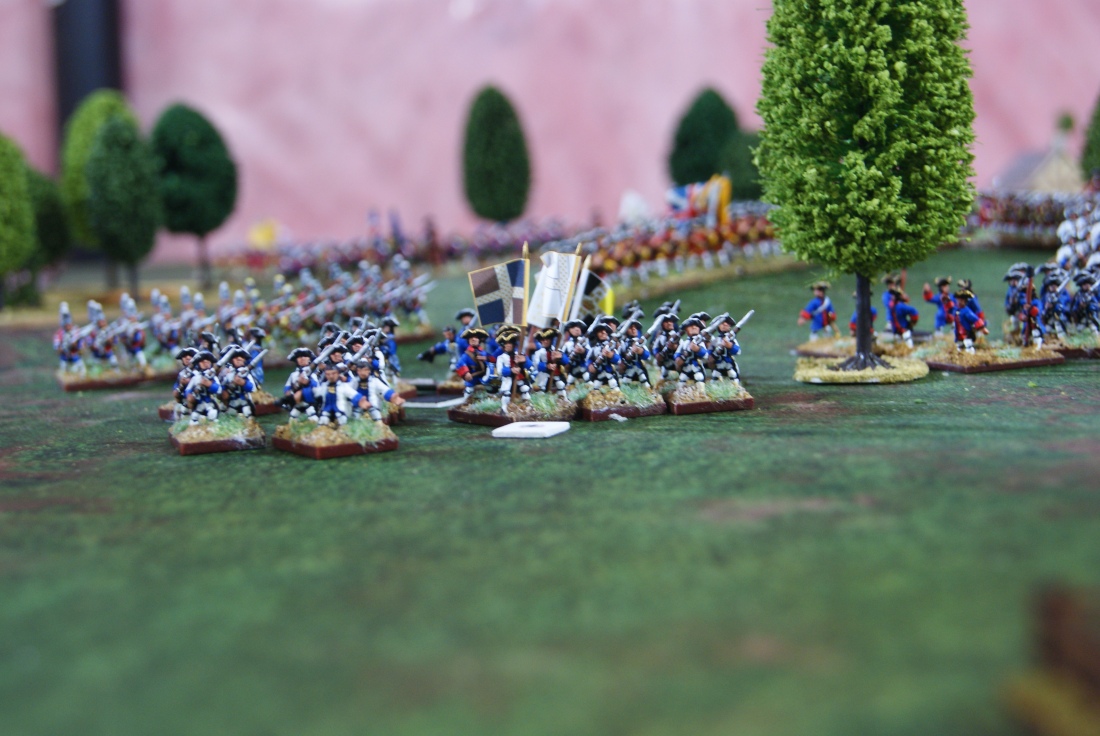
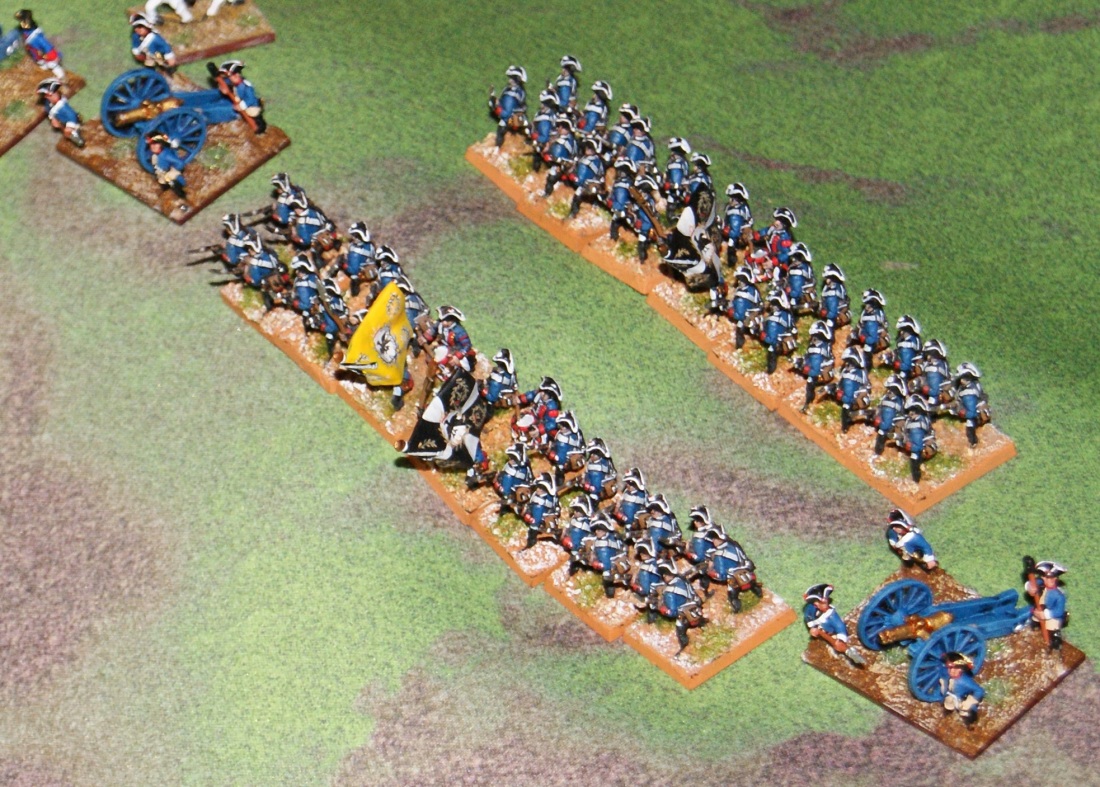
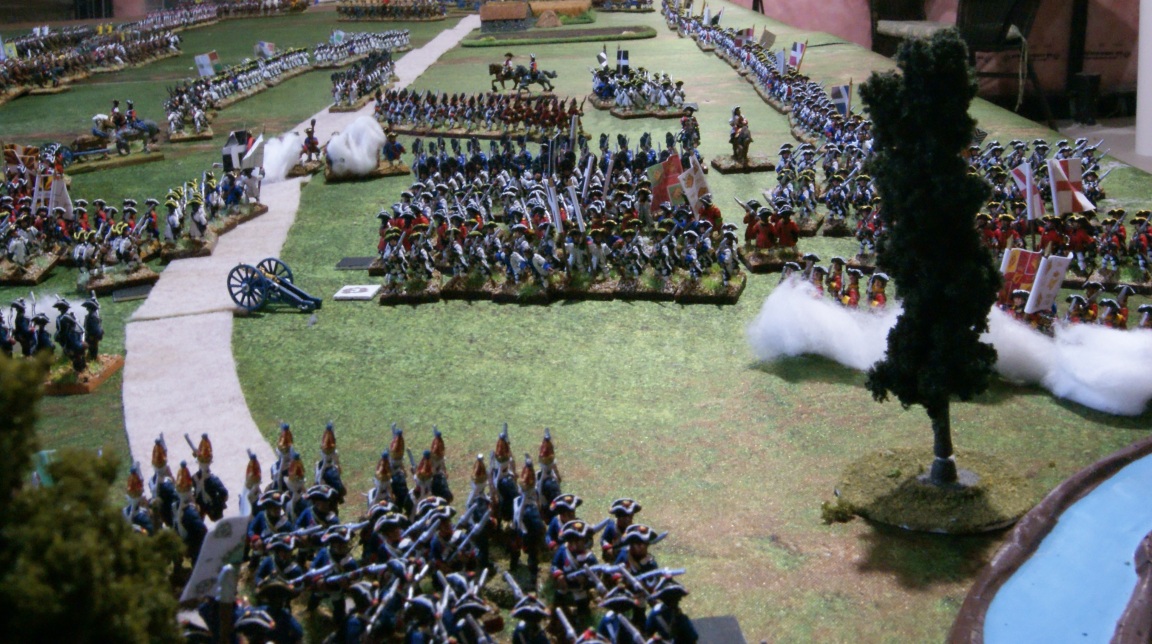
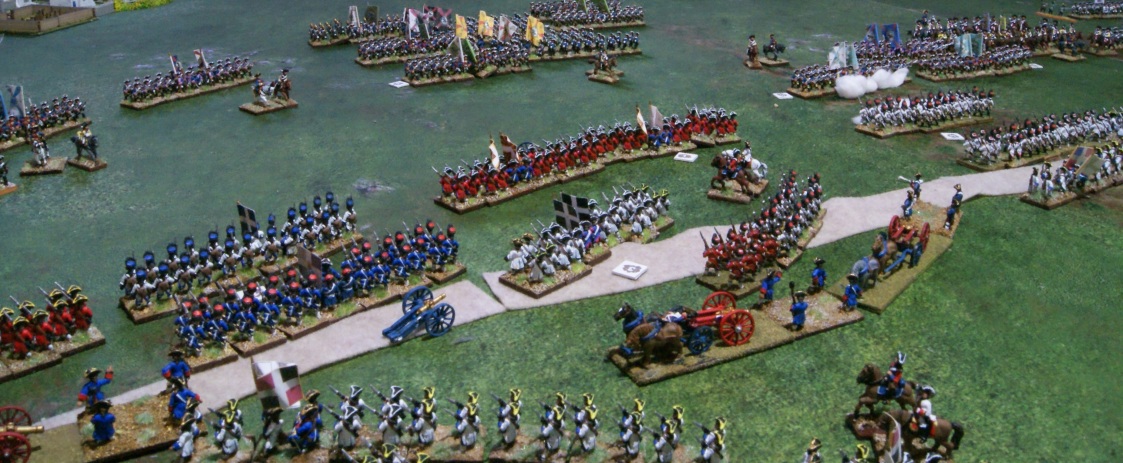
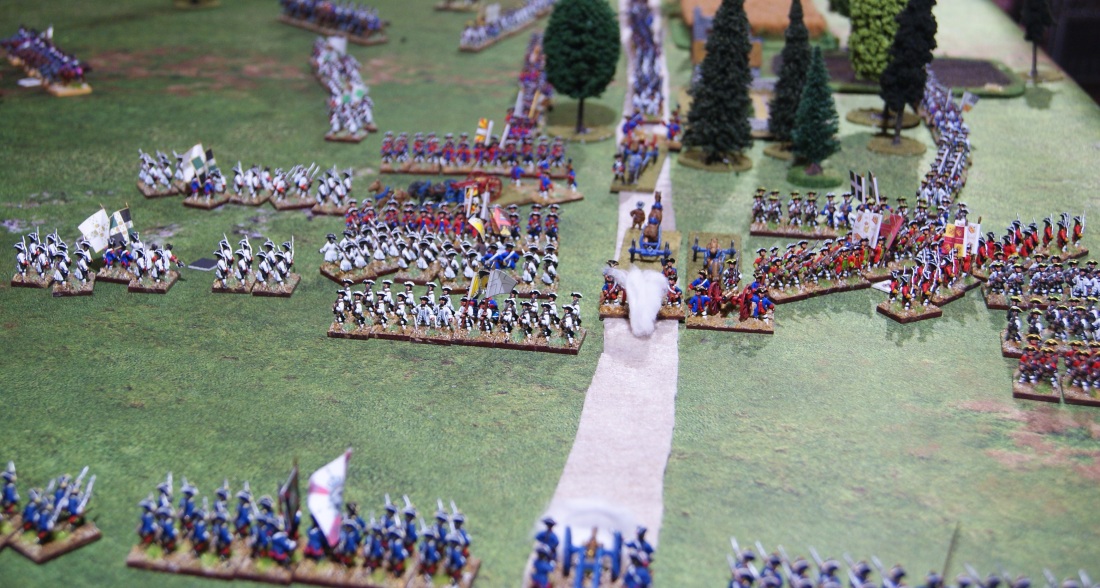
The two center French brigades take stage center as they advance on the Alliance position. In the rear the French artillery has opened up.
The Alliance artillery opens up as soon as they start moving. Cannon balls start crashing through the lead battalions, often continuing on to do nasty work in the second and third battalions. The right-center brigade of the French is not harmed as the Alliance view of them is interrupted by the trees of the orchard. Unfortunately for the left-center brigade this means that two enemy batteries are plying their destructive trade on them. Before even crossing the stream, the first battalion recoils, throwing the rest into disorder. More deadly spheres crash into their ranks, sending that battalion – and shortly thereafter the second battalion – flying from the field.
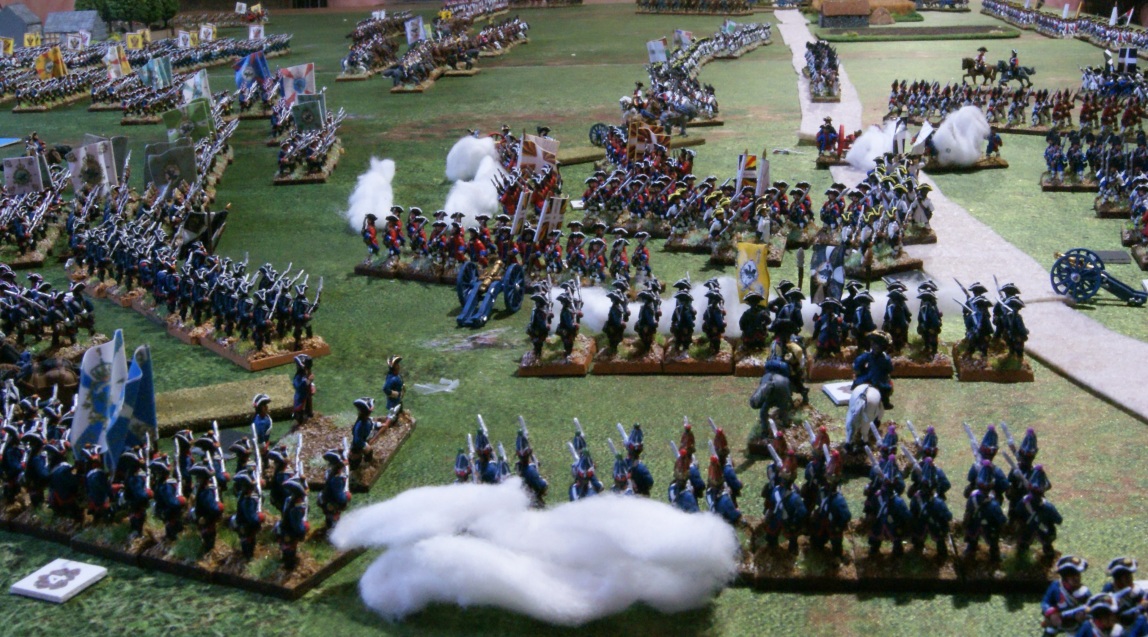
 The French right-center brigade (on the left) shown in some confusion as the leading battalion recoils. Seen from above the Alliance’s central artillery position of two batteries.
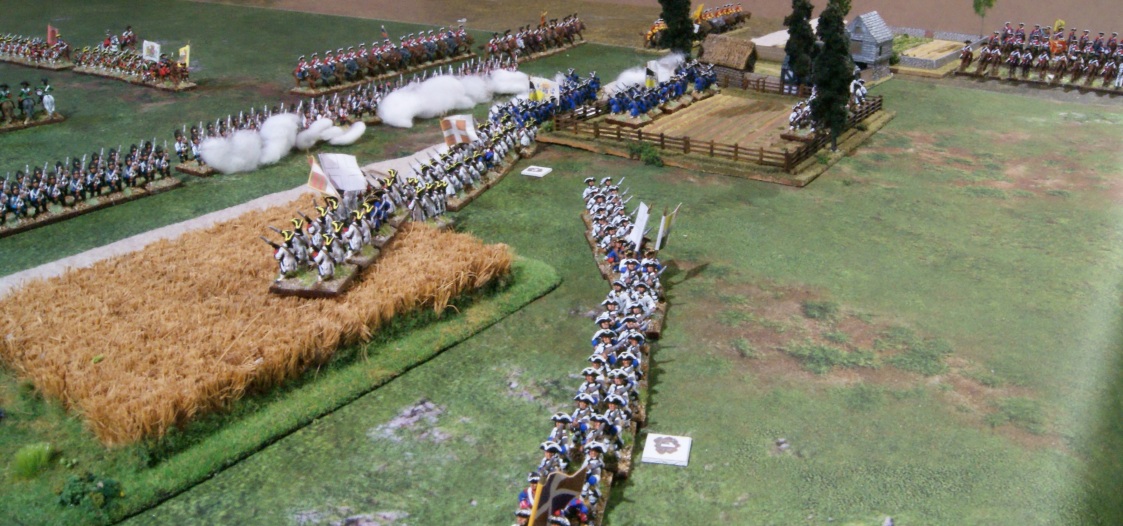
In the right-hand French brigade the lead battalion also suffers from the attentions of the Prussian gunners. When they come in range of the farmhouse they come into a galling fire from the loopholes and barricaded windows. That’s enough for them and they’re off for parts unknown.
The second battalion of that brigade and battalions from the right-center brigade combine to take the farmhouse under fire, while one of the French batteries chimes in. They become bogged down in a firefight; numbers against prepared position.
And no one has even crossed the stream yet.
The cavalry on both flanks manage it first. The lead dragoon regiment on the left flank, already in some disorder, takes a blast of cannister and a volley of musket balls and recoils. They kick it into reverse, disordering the following dragoon regiment just as it is crossing the stream.
The French left flank infantry regiment advancing, with the Royal Dragoons to their left. At the back the Apchon Dragoons can be seen fleeing the field.
On the French right flank their heavy cavalry is over the stream.
They advance quickly toward the lowest – and apparently undefended – section of the ridge, ignoring the nasty flanking fire all the while from the farmhouse. Almost in sight of an apparent victory, they are not entirely surprised to find a regiment of Prussian cuirassiers coming over the ridge in front of them, quickly followed by another. Even more standards are seen behind them. Trouble!

With the enemy charging downhill on them, the Royal Allemande are sent off quite quickly without doing much damage to the enemy. That leaves a somewhat disorganized Schomburg Dragoons to face what turns out to be FOUR regiments of cavalry. (Okay, three and a half. That’s still pretty long odds.) The one saving grace is that the Prussian battalion that was firing on their flank has been sent off by concentrated fire by the French infantry.
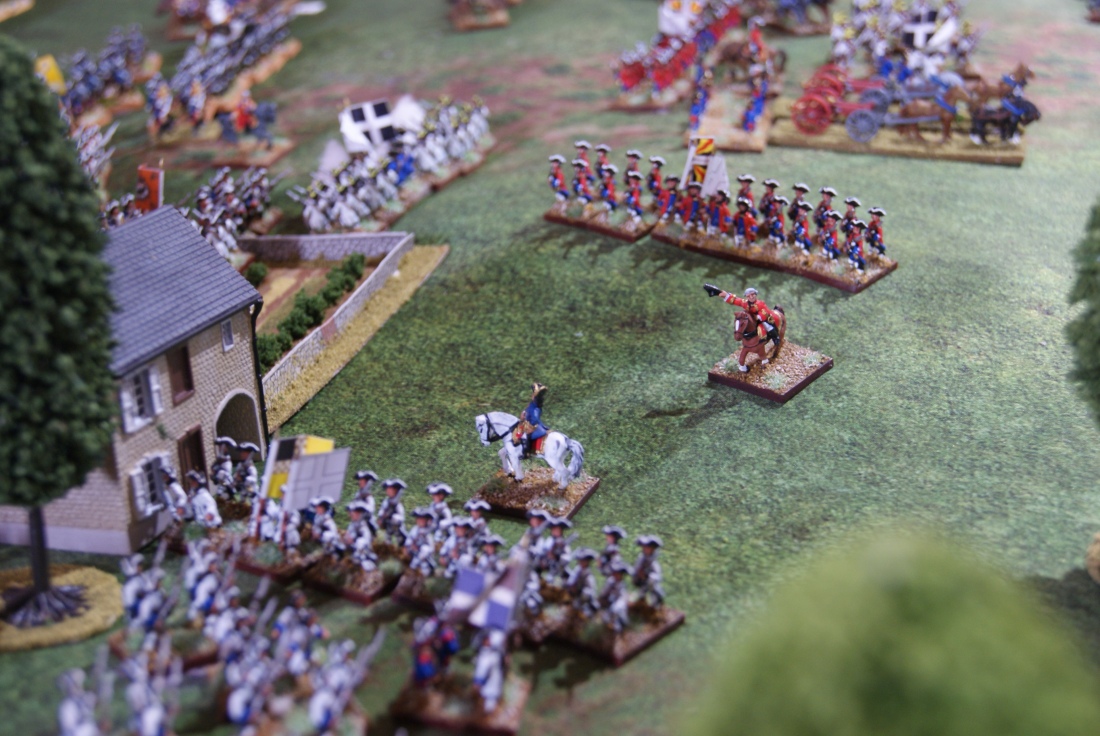
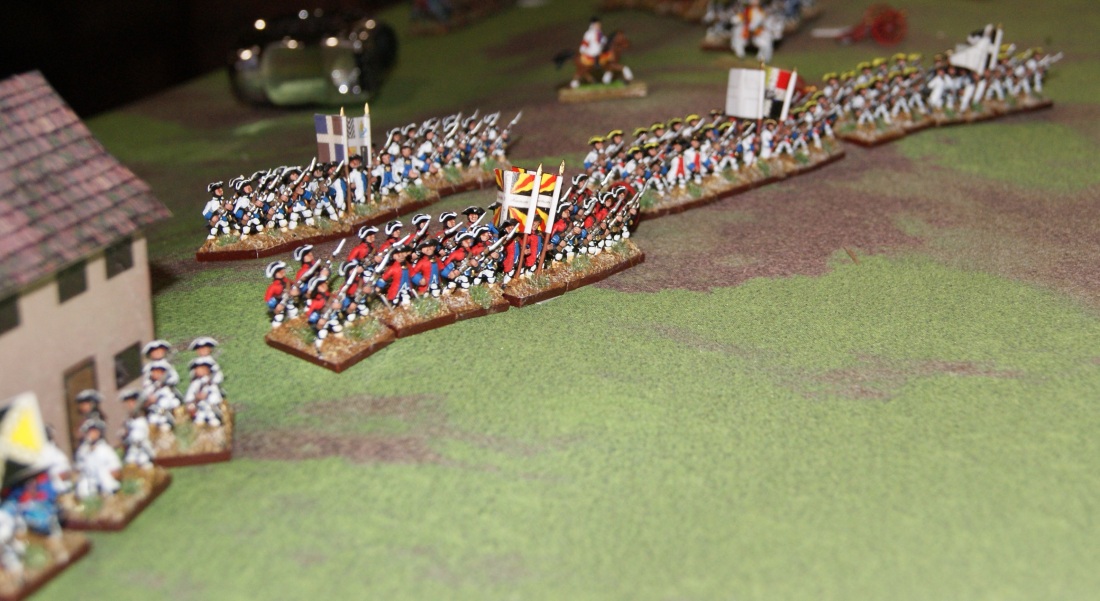
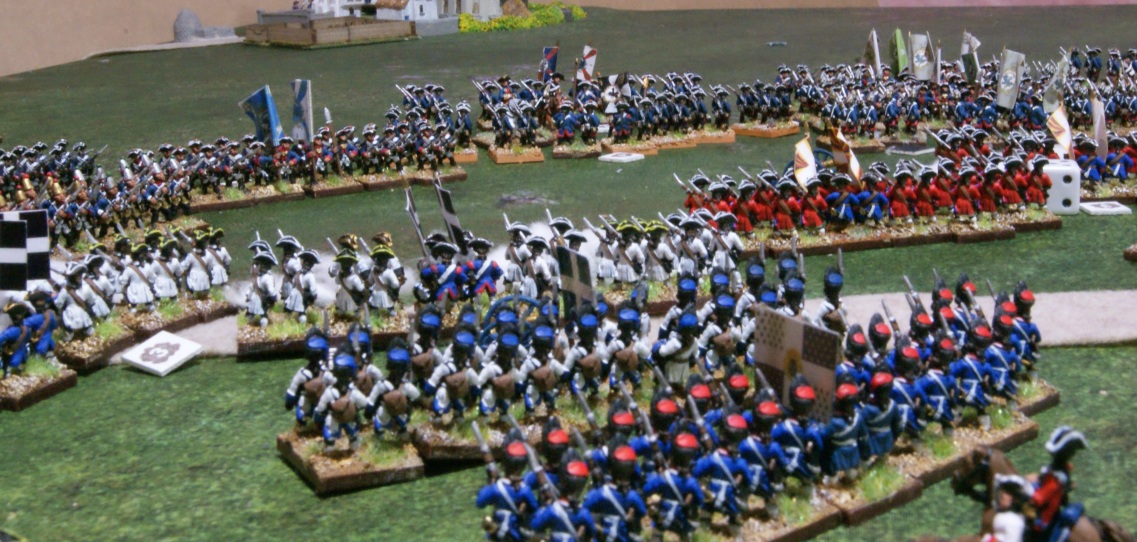
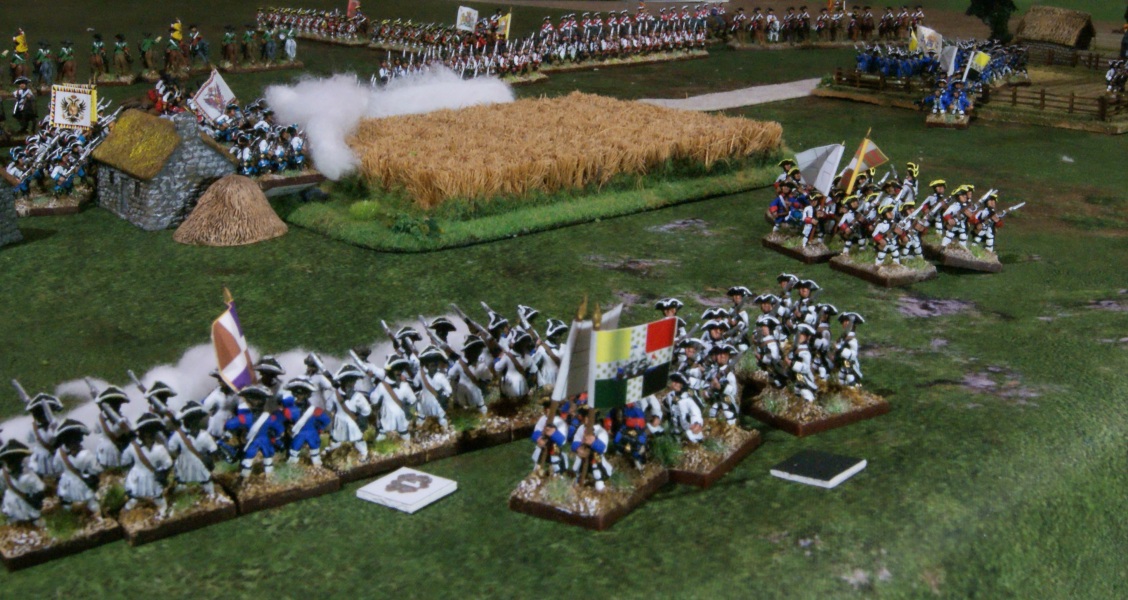
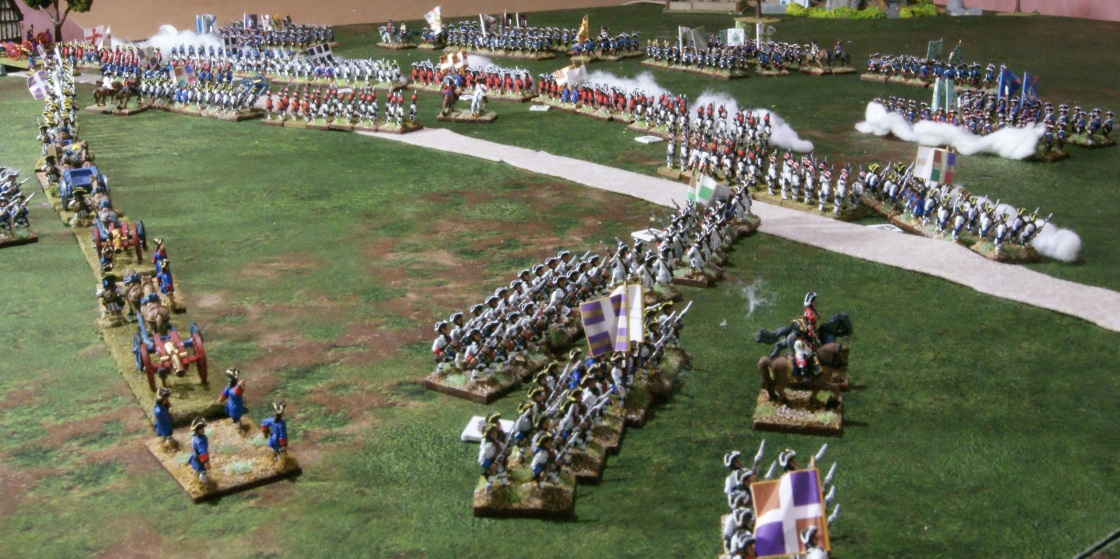
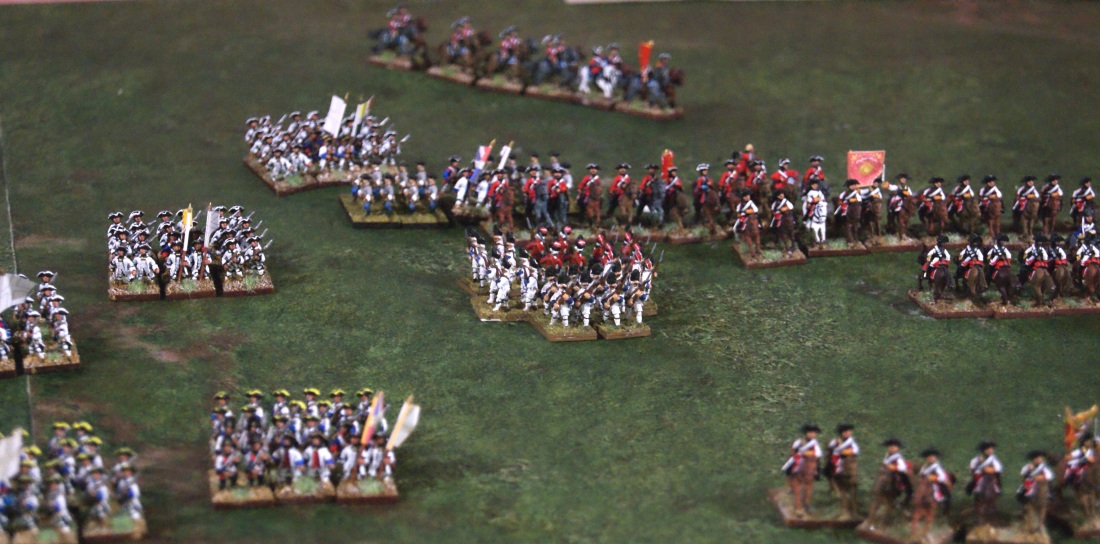
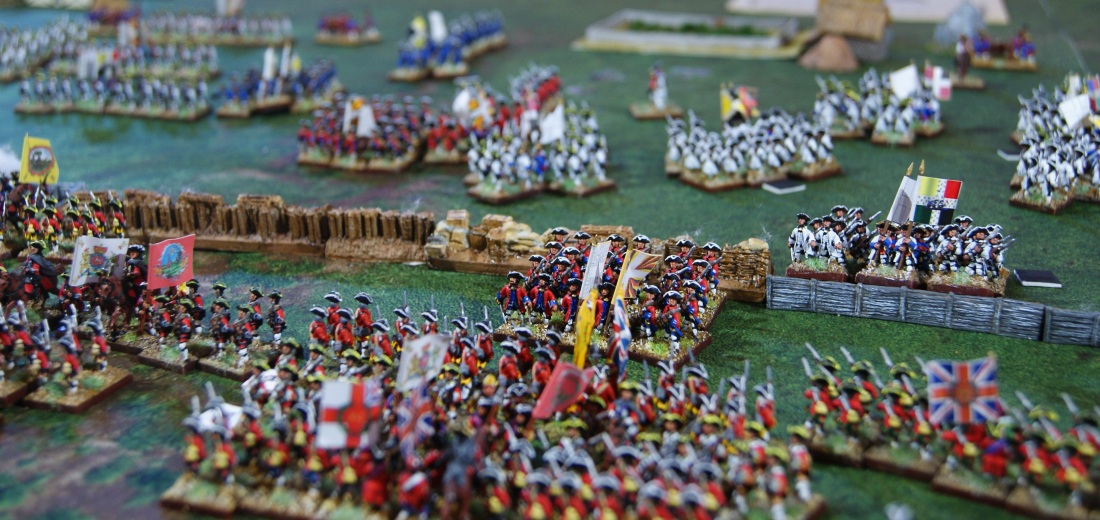
From left to right Royal Lorraine, Gardes Lorraine and Saintonge regiments move up to attack the Prussians sequestered in the farmhouse. Note the colourful and completely fanciful Colonel’s standard of the Royal Lorraine, showing the (fictitious) quarterings of the Colonel’s coat of arms.
Schomburg Dragoons bravely facing up to four enemy cavalry regiments. In the foreground can be seen Royal Allemande fleeing. In the upper left can be seen parts of the Prussian battalion that was driven out of the farmhouse.
The inevitable happens. Having been disrupted by Royal Allemande pushing through them the dragoons are unable to charge. Despite previous exertions the uplifted Prussian Garde du Korps works up to a good charge and scatters the Schomburgs.
On the French left flank the remnants of their attack makes a feeble attempt. Two battalions continue forward, despite getting little support from their left-flank cavalry. Before they can continue with their suicidal attempt, orders reach them to retire. The French center has collapsed, and their right flank looks in a fair way to disintegrating as well. It looks like it is time to get out.
Now at this point it becomes obvious who the winner and loser is. If your friend had come over to be your opponent, and the evening was getting on, you might be thinking of breaking it up and going home. Even if that was not the case, who would want to preside over a dismal retirement or perhaps even a route.
But that is not the case. This is a solo game, and not only that but it is a part of a campaign. What happens now can be quite crucial to the campaign. Especially with the French disintegrating and the Alliance still with a large body of fresh and intact cavalry.
Play on!
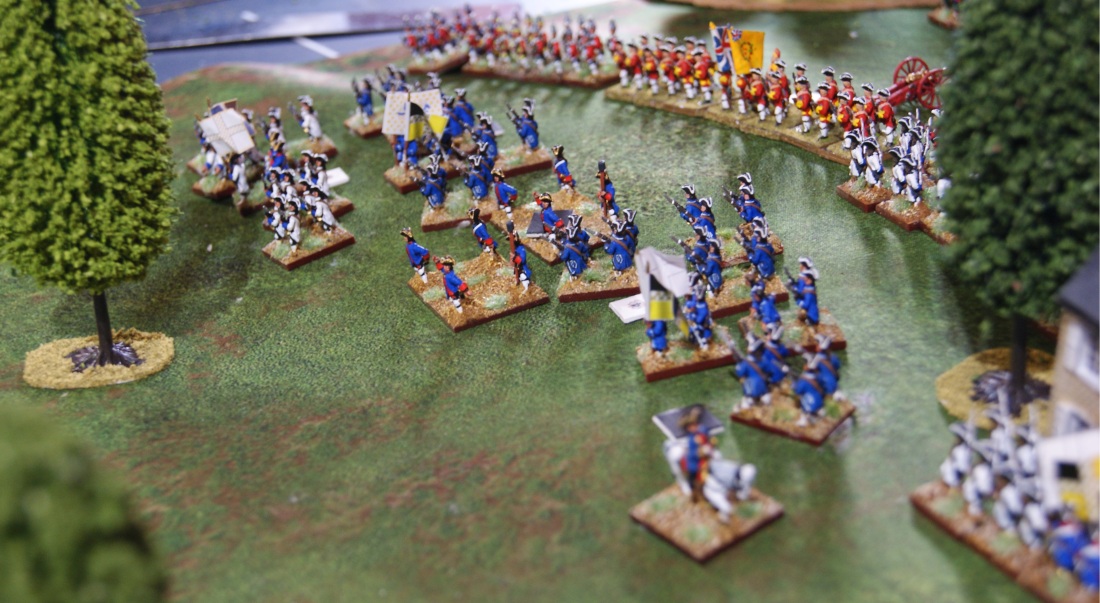
The collapse of the French center.
Well, it never rains but it pours. One of the center French battalions, Royal Vaisseau, trying to reform, gets hit by cannon fire and breaks and runs. They are heading for the horizon. At the same time Apchon Dragoons, having recovered some of their equalibrium by reforming, get hit by cannon balls aimed at – but missing – the Royal Dragoons. They too go flying back to safer waters.
And if things aren’t bad enough, the French artillerists, seeing their infantry and cavalry departing in haste, decamp as well. Without their guns.
Meanwhile the French infantry battalions still in good order are falling back to the ridge on their side of the water, in hopes of making some kind of a stand. However their morale is still fragile, as demonstrated by one more of their number deciding to get out while the going is good. The Royal Reg’t is scattered by a hail of bouncing cannon balls.
The French infantry forming up for a last stand on their side of the valley.
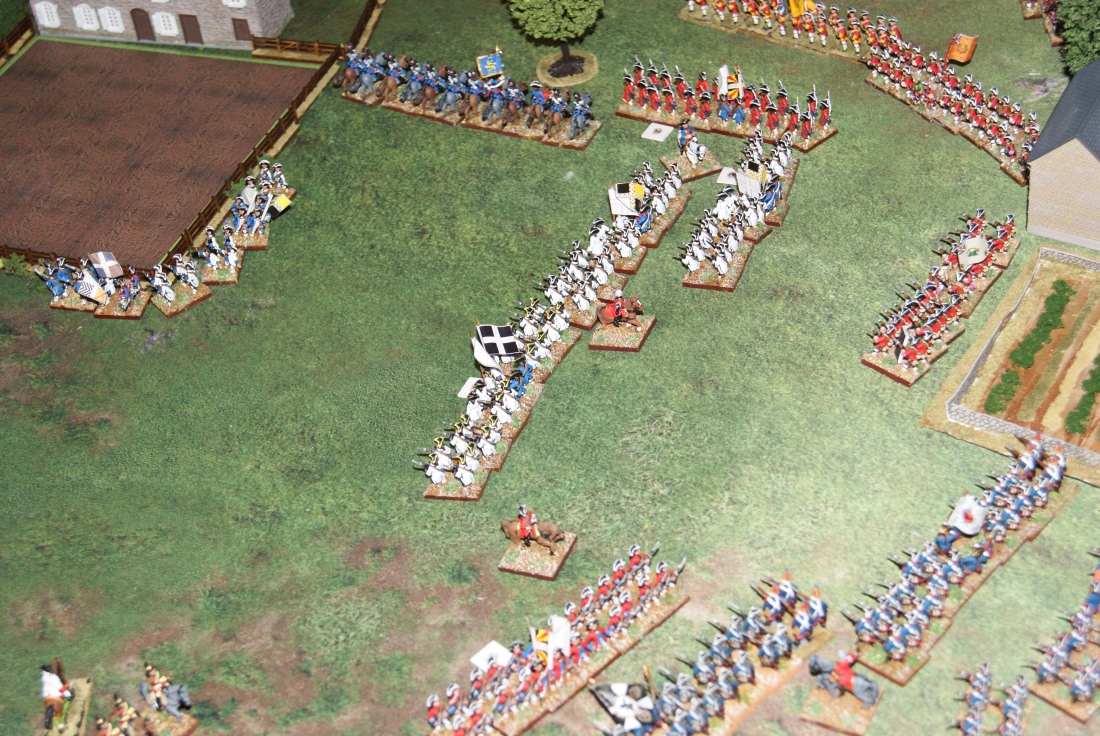
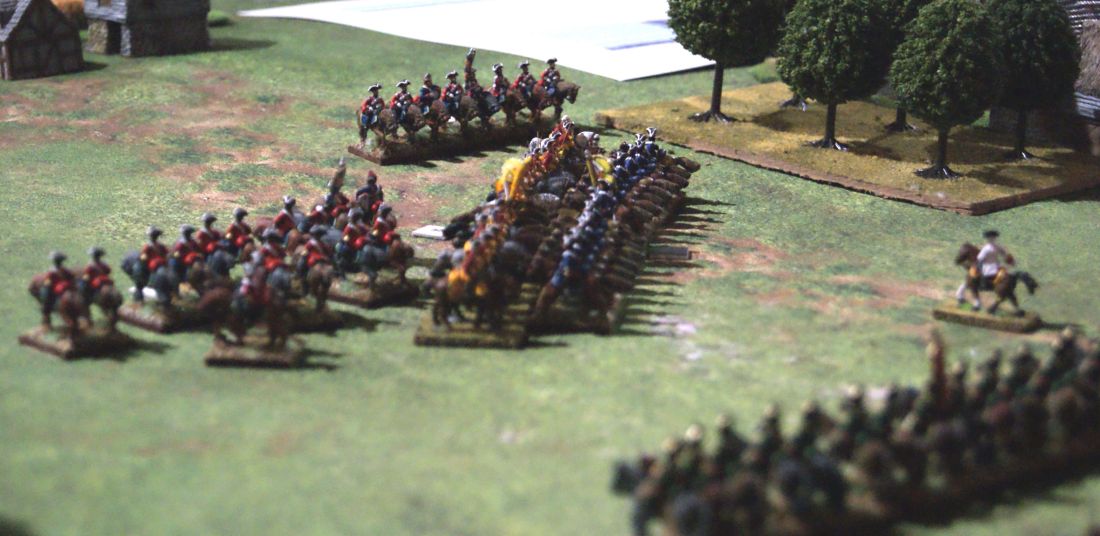
The infantry forms a line just in time. The Alliance cavalry, after slowing to wade through the stream, come on with serious intent. The Garde du Korps continue straight ahead, pursuing the fleeing French dragoons, but the rest of the cavalry veer to their right to take on the infantry line.
The Alliance cavalry comes pouring through.
As the Garde du Korps passes the large building they take a devastating volley from the Royal Lorraine, who have taken up residence in the building. It’s enough to turn them around and head for the quiet relief of their own lines. While this is going on the Gens d’Armes crash into the I/Diesbach battalion. Faced by those nasty bayonets and taking flanking fire from Royal Lorraine, they too decide they have had enough. However the Diesbach are sufficiently shaken to turn and run as well.
The alliance cavalry coming up against the French last stand. In the foreground the Garde du Korps are retiring precipitously after having been flanked by the Royal Lorraine.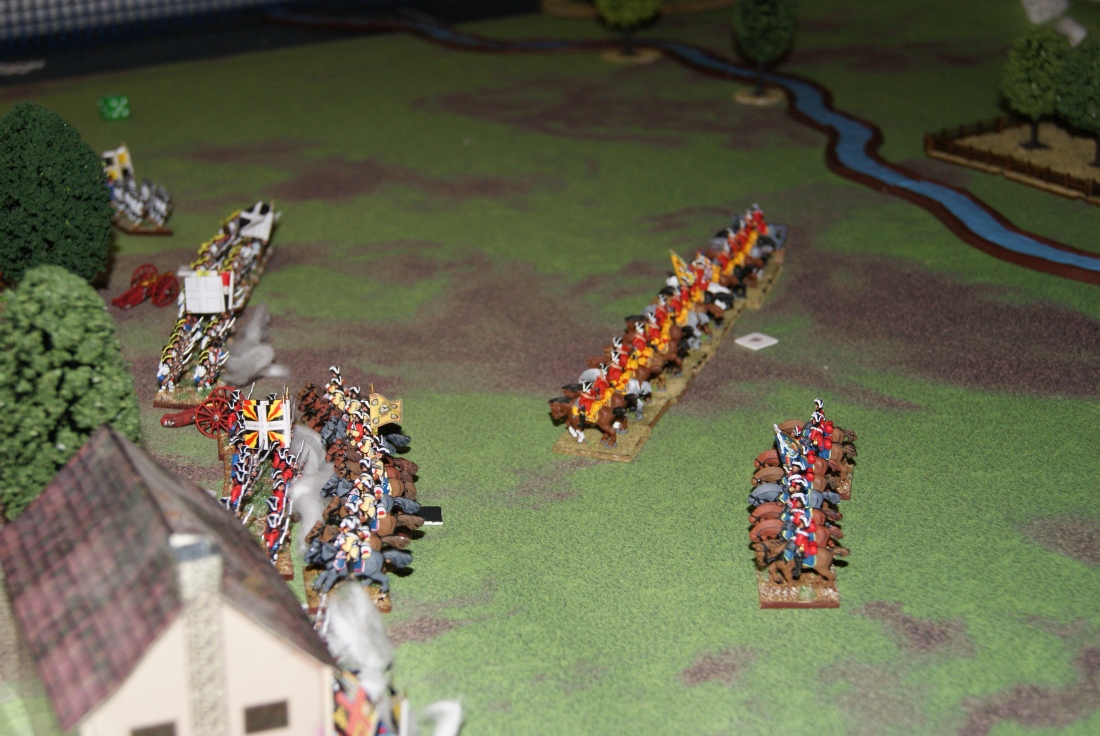
Another view of the same action. In the near left the Gens d’Armes are mixing it up with the Diesbach. The six squadrons of British dragoons are moving up in support.
The 10th Dragoons charge up to engage two enemy battalions at once (greedy S.O.B.s) while the 2 squadrons of the 1st Dragoon Guards heads for the gap left by Diesbach. However help is at hand. The French Royal Dragoons are rested and ready to go. Coming over from the far flank, they prepare to close that potentially disastrous gap.
Hitting the two battalions, 10th Dragoons do enough damage to send one or the other of the units running. Unfortunately spread between the two of them it just isn’t enough. Conversely the two of them do enough damage to put the 10th out of the fight permanently.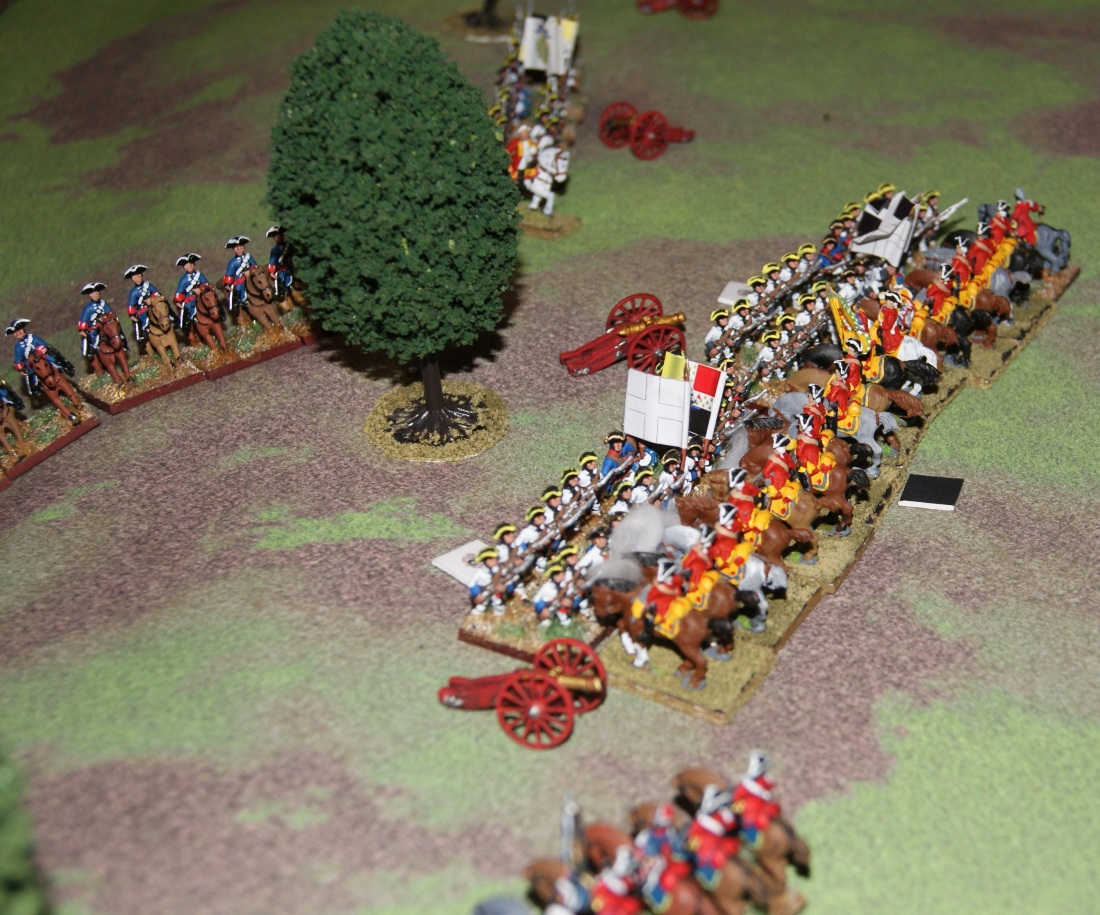
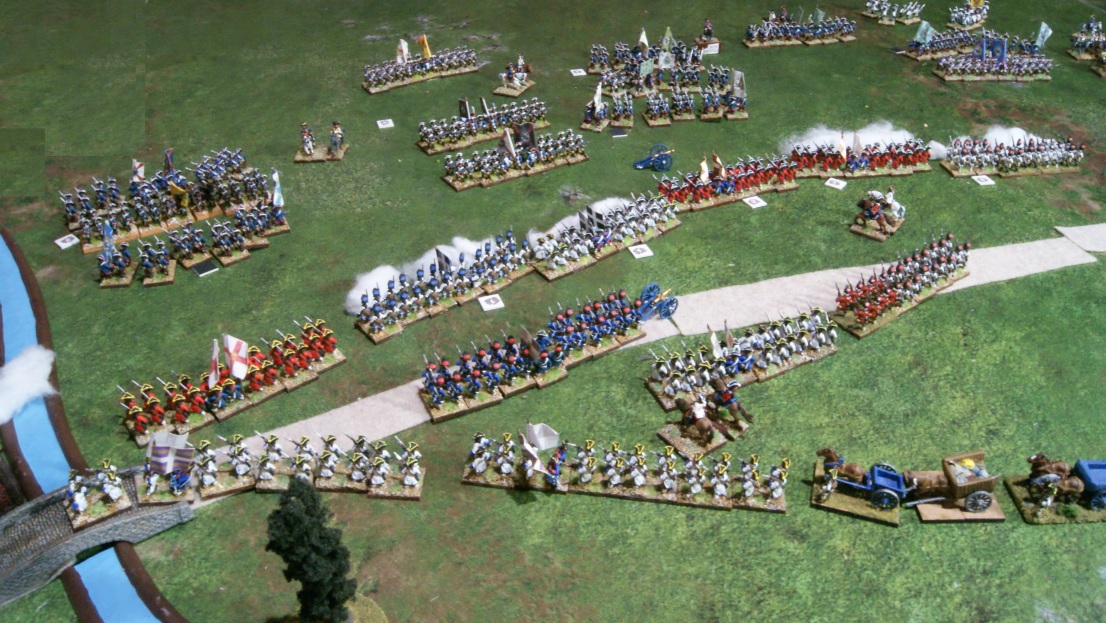
10th Dragoons engaging two French infantry battalions. At the bottom, 1st Dragoon Guards move into the gap while the French Royal Dragoons come forward in an attempt to stop them. Note the abandoned artillery pieces.
Seeing their companion unit turning and fleeing, the 1st Dragoon Guards decide that discretion is the better part of valour and retire. At least as far as where the Garde du Korps cuirassiers are reforming.
The Royal Dragoons and the remaining French infantry are happy to let them go. Both sides eyeball each other as the French slowly withdraw from the battlefield. With just a little more ineffectual firing on the part of the Alliance artillery, the battle is finally over.
(Interesting to note that the final skirmishing would most likely never have happened if this had been a dual battle.)
End results: The sum total of French units withdrawing intact from the battlefield are 4 infantry battalions and 2 dragoon regiments (Apchon Dragoons were still reforming at the end of the battle.) That’s 96 and 64 points for intact units. Seven battalions, 2 cavalry regiments and 4 artillery batteries left the field in an embarrassingly precipitous manor so they only count for half points: 84 + 28 + 20 = 132 + the intact 160 equals 292 final total. That’s considerably less than their original 424 points. 8 times 292 divided by 424 gives a little more than 5 strength points rounded down to 5.
The Alliance started with 371 points and lost a sum total of 28 points due to two cavalry regiments becoming demoralized. Thus they get to keep their 7 strength points.
Lessons learned for the French? Don’t place your units one behind the other; artillery balls just skip right through them. More importantly, don’t attack a good defensive position unless you have at least a good clear 2-1 superiority.
The campaign continues.
When news reaches the garrison at Venlo that the relief attempt has failed, they lose heart. The next day they hang out the parley flag, and within 24 hours have agreed to surrender as prisoners of war.
July 1st, 1702.
This being the beginning of the month, we get to turn up two new event cards. For the French, Boufflers is sacked. The Duc d’Orleans is brought on as his replacement. Until that time Coigny is in command of the French field army. He heads southwest. Ginkel moves down to besiege Roeremonde, while Marlborough moves down the left bank of the Maas river to cover the siege.
July 16th, 1702.
Treachery! Coigny and the French army approach Maastricht with intent. Someone within the great fortress has sent a message to the French. They will open a sally port to the French in the middle of the night, giving them surprise access to the whole place without having to storm it. The deed succeeds, and Maastricht has fallen to the French. Two strength points and the commander, Slangenburg, have all become prisoners of war.
The siege of Roeremonde continues.
August 1st, 1702.
Leaving 2 strength points in Maastricht, Coigny retires toward the Lines of Brabant with a much diminished French army. He arrives at Louvain, where he is joined by the Duc d’Orleans, who supercedes him.
Marlborough is joined by some United Provinces reinforcements. As the siege of Roeremonde is going well and the main French forces have left the area, Marlborough moves forward to threaten Maastricht while at the same time setting Opdam up to besiege Stevenswaert. Shortly thereafter the starving garrison of Roeremonde gives up.
Ginkel leaves a token garrison in Roeremonde and brings the remaining of his troops to help with the siege of Stevenswaert. Of course he assumes control of the operation.
August 16th, 1702
Apparently Stevenswaert was no better provisioned than Roeremonde. The starving garrison asks for terms (and food) long before a proper breach is made.
September 1st, 1702
Showing unaccustomed speed (or a good die roll) Ginkel ups his skirts and moves south to invest Limberg with his Army. Marlborough crosses the Maas at Stevenswaert and moves down to cover the operation.
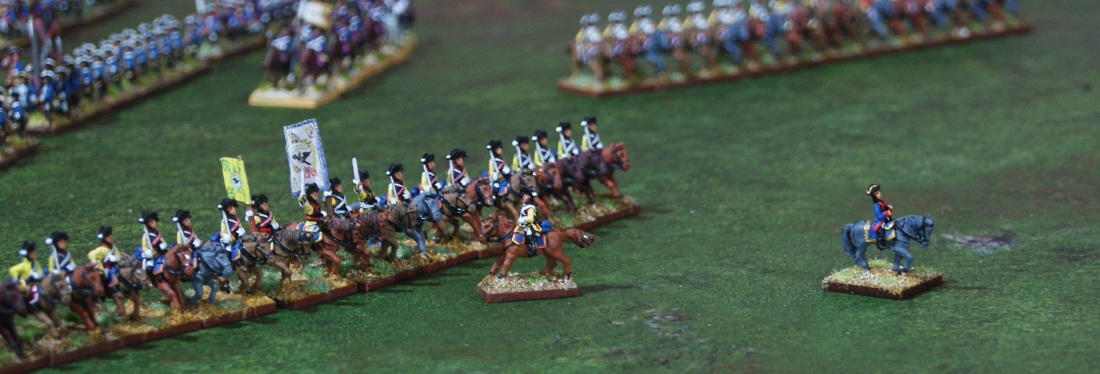
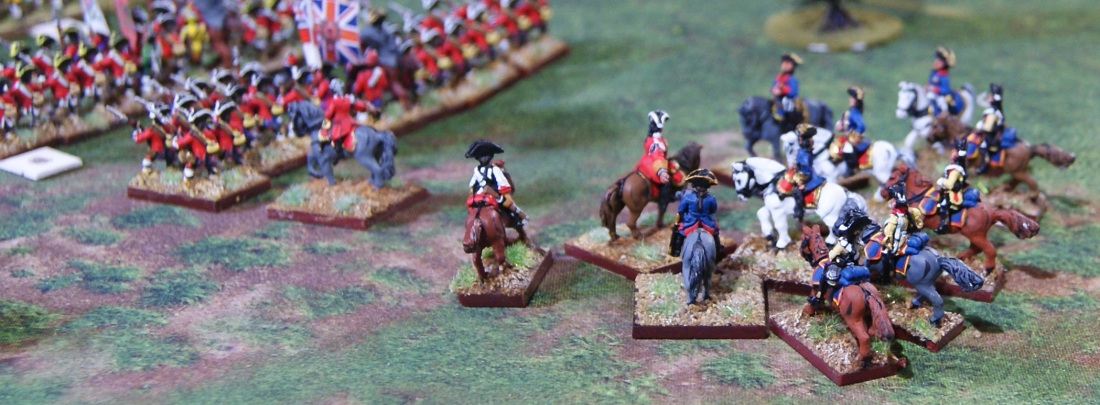
The Duc d’Orleans reviews his troops.
September 16th, 1702
Limberg is truly invested and under siege. The commander of the garrison has been following events in the area. Two days after the siege officially begins he agrees to surrender. He too claims he is out of provisions (although strangely the incoming United Provinces garrison finds storehouses brimming with fresh food and livestock.)
The Duc d’Orleans moves his Army from Louvain into the great fortress of Maastricht. There he pauses to attend a number of soirees.
October 1st, 1702
Leaving a token garrison, Ginkel leaves Limberg and joins with the Duke of Marlborough; both move to Stevenswaert. United Provinces reinforcements, having previously moved to Nimwegan, seem reluctant to leave their country and join Marlborough. Their commander, Opdam, is an understanding sort. He has taken the opportunity of the fortnight’s rest to refresh himself in preparation for the coming journey.
The Duc d’Orleans has been unaccountably busy. To celebrate the recent liberation of Maastricht he has thrown a grand ball for all the notables of the city. Not only that but he has commissioned a Te Deum to be sung at the major cathedral in the center of town.
October 16th, 1702
In a sudden fast move, Marlborough is off by the seacoast, investing Antwerp.
The Duc d’Orleans sees his opportunity and moves east to try to take Stevenswaert back.
November 1st, 1702
Marlborough is determined to stop the siege of Stevenswaert and bring d’Orleans to battle, but his determination is foiled when he falls ill with a chronic headache. (Okay, okay, the French player lays a “You may not move this turn” card on him.)
Antwerp falls.
Stevenswaert does not.
French luck with the dice just does not seem to be “in.”
November 16th, 1702
Leaving a minimum garrison in Antwerp, Marlborough swoops down on the Duc d’Orleans’ covering army. The Duc is poised on a series of hills in a gap between two branches of the Woods of Stevenswaert, and will not be easy to winkle out.
Cue Baroque music!


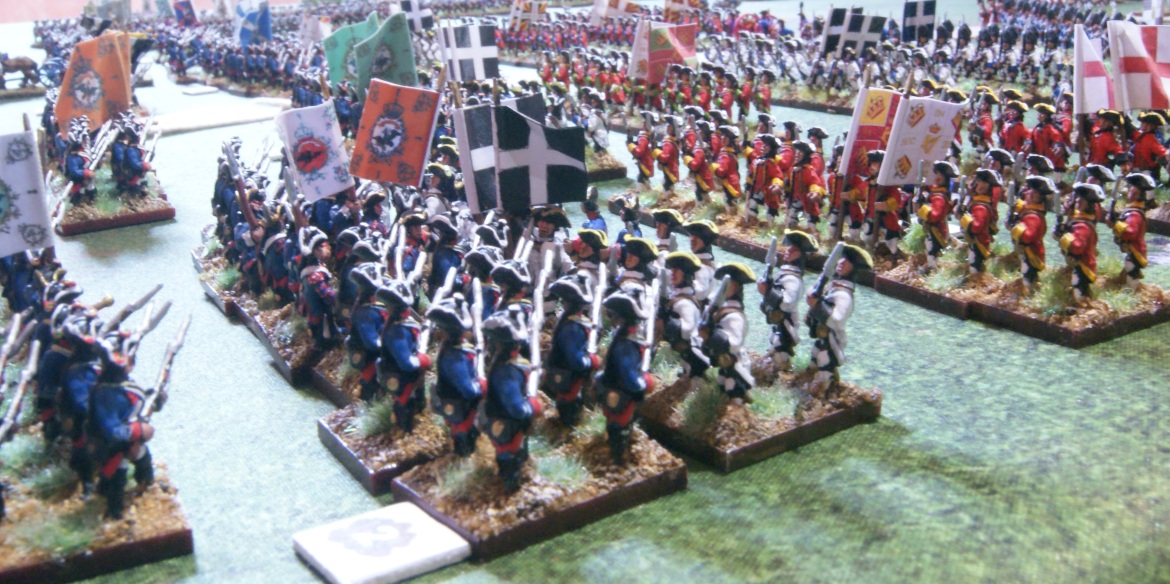
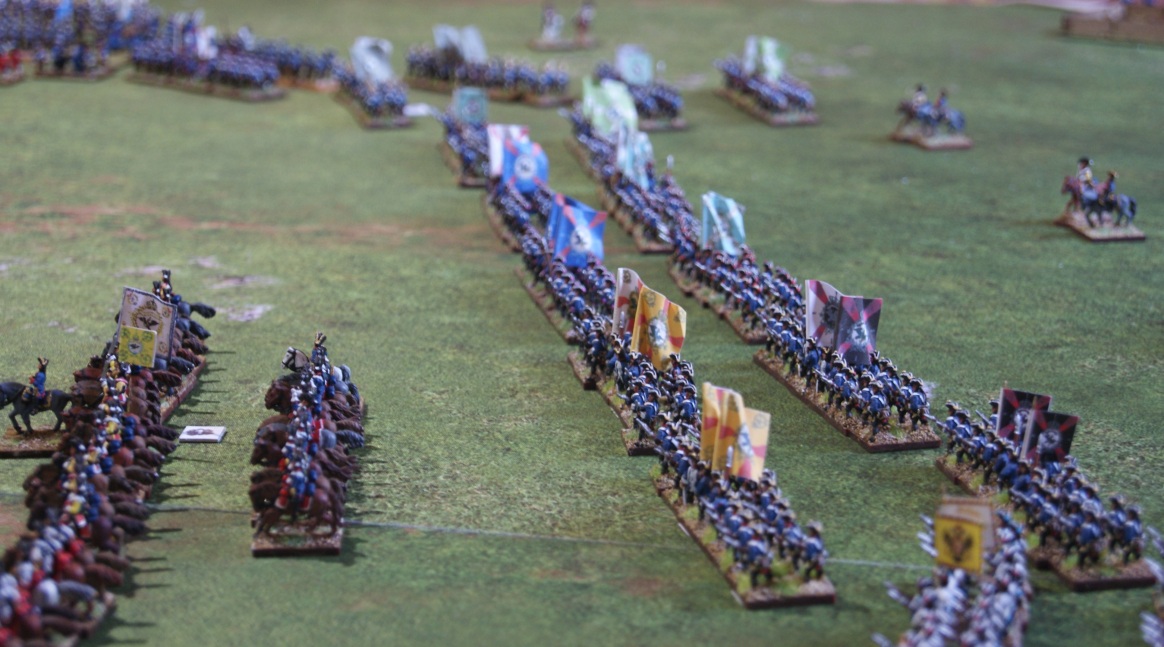


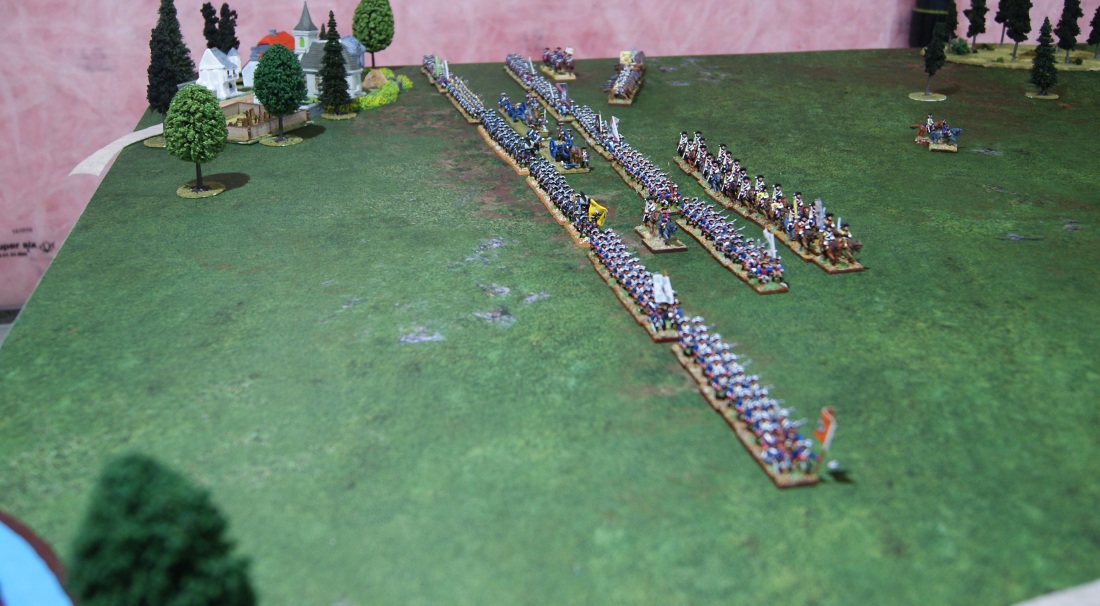

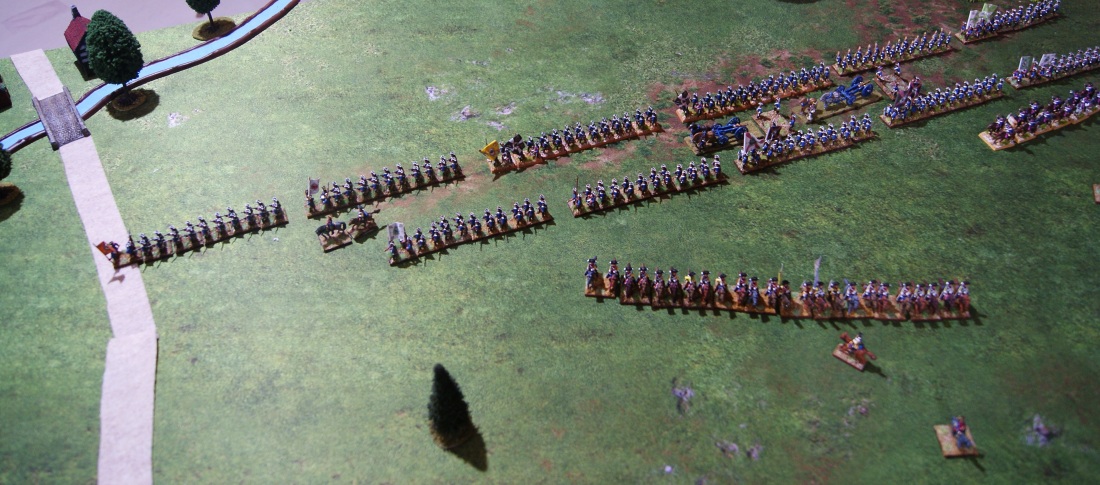

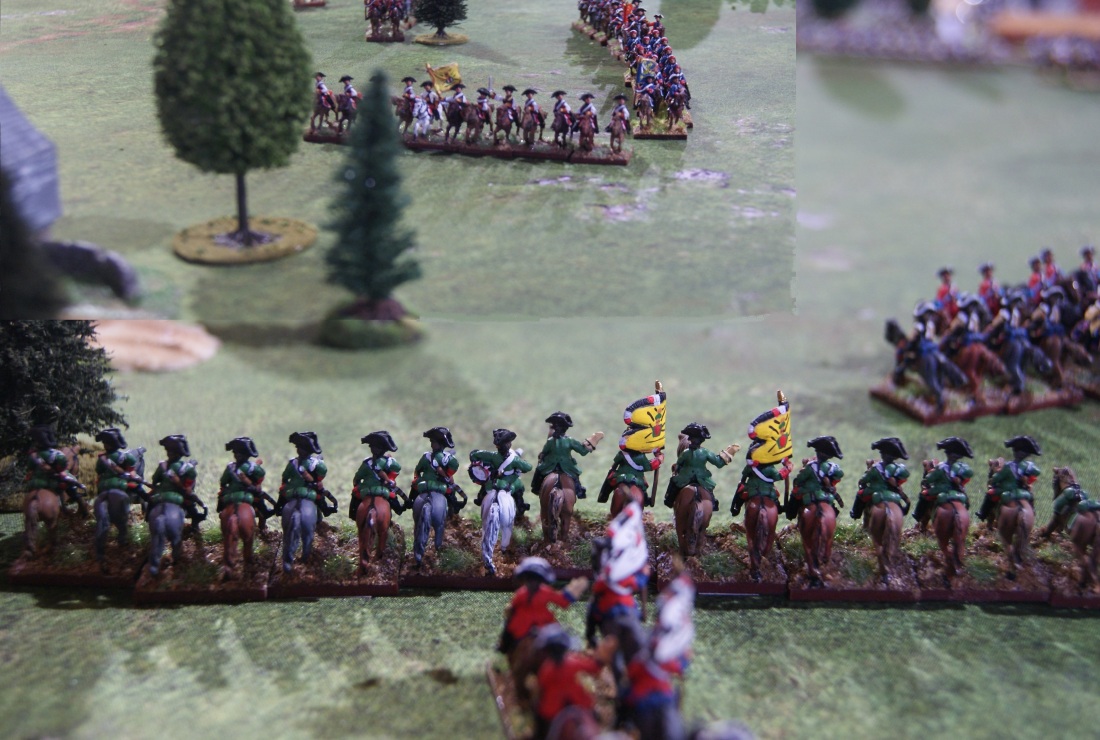


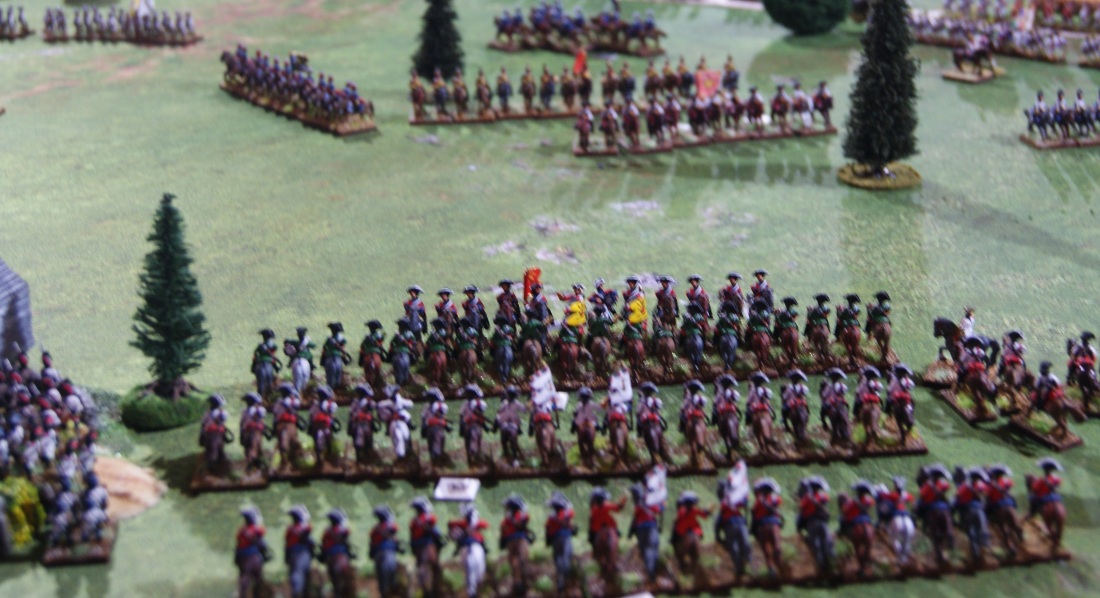


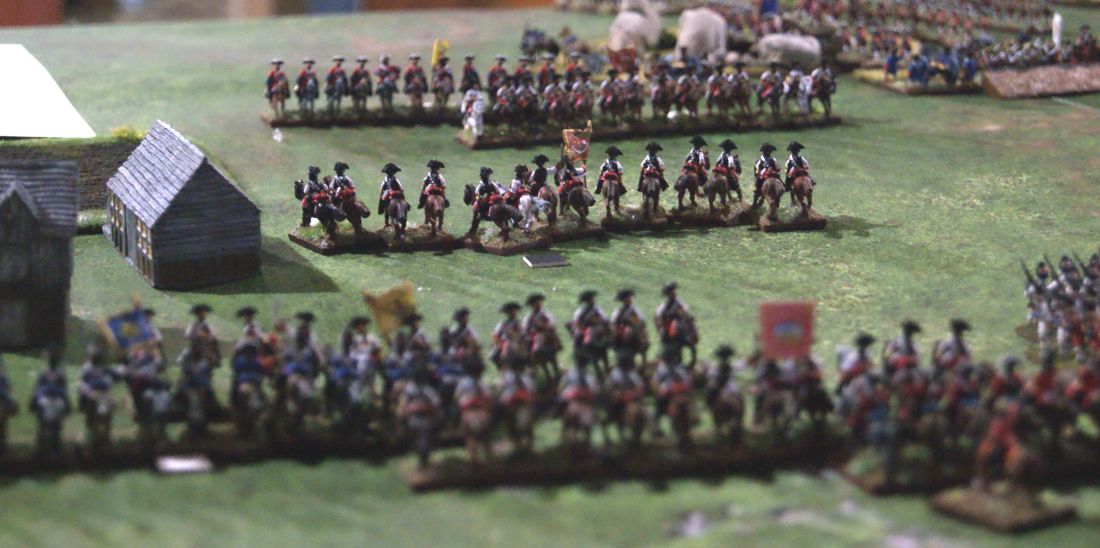


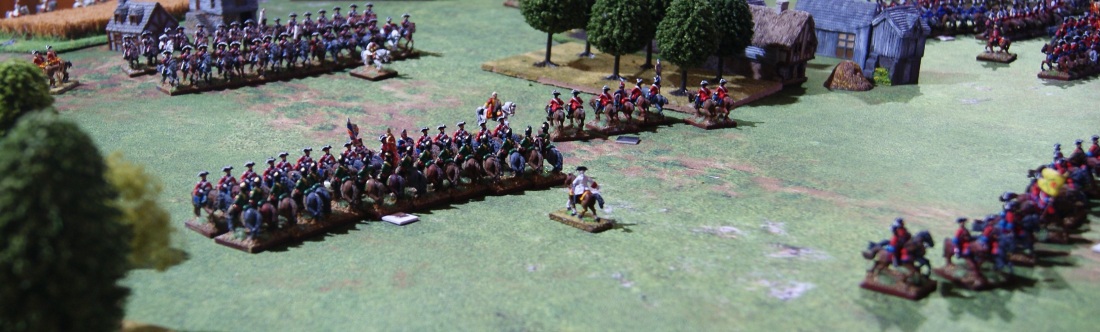


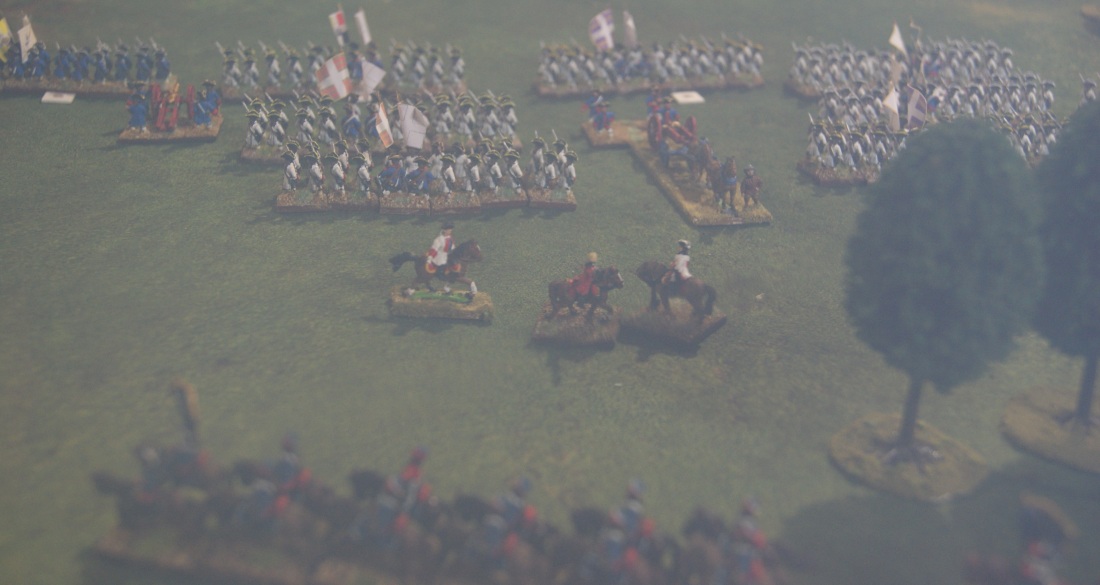
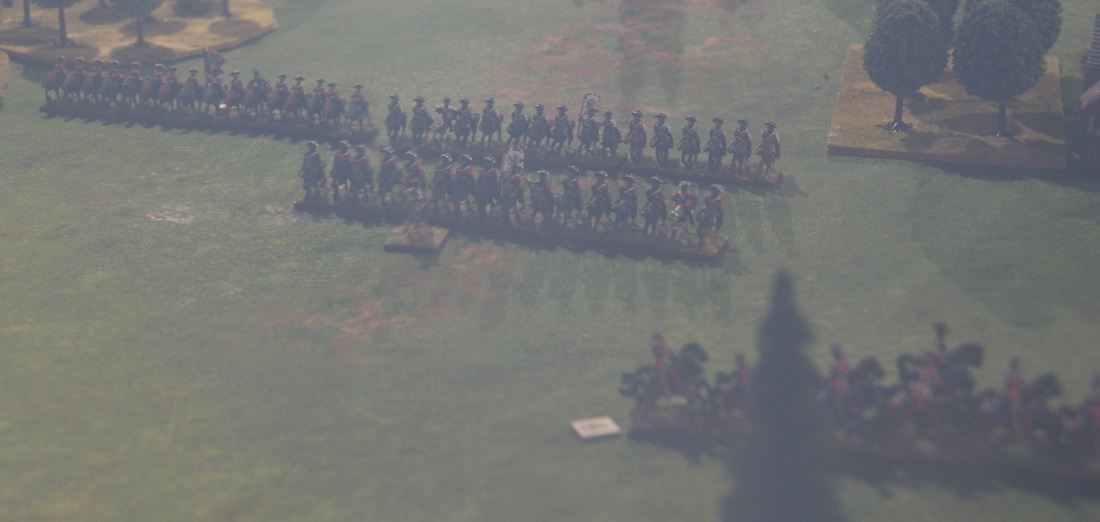

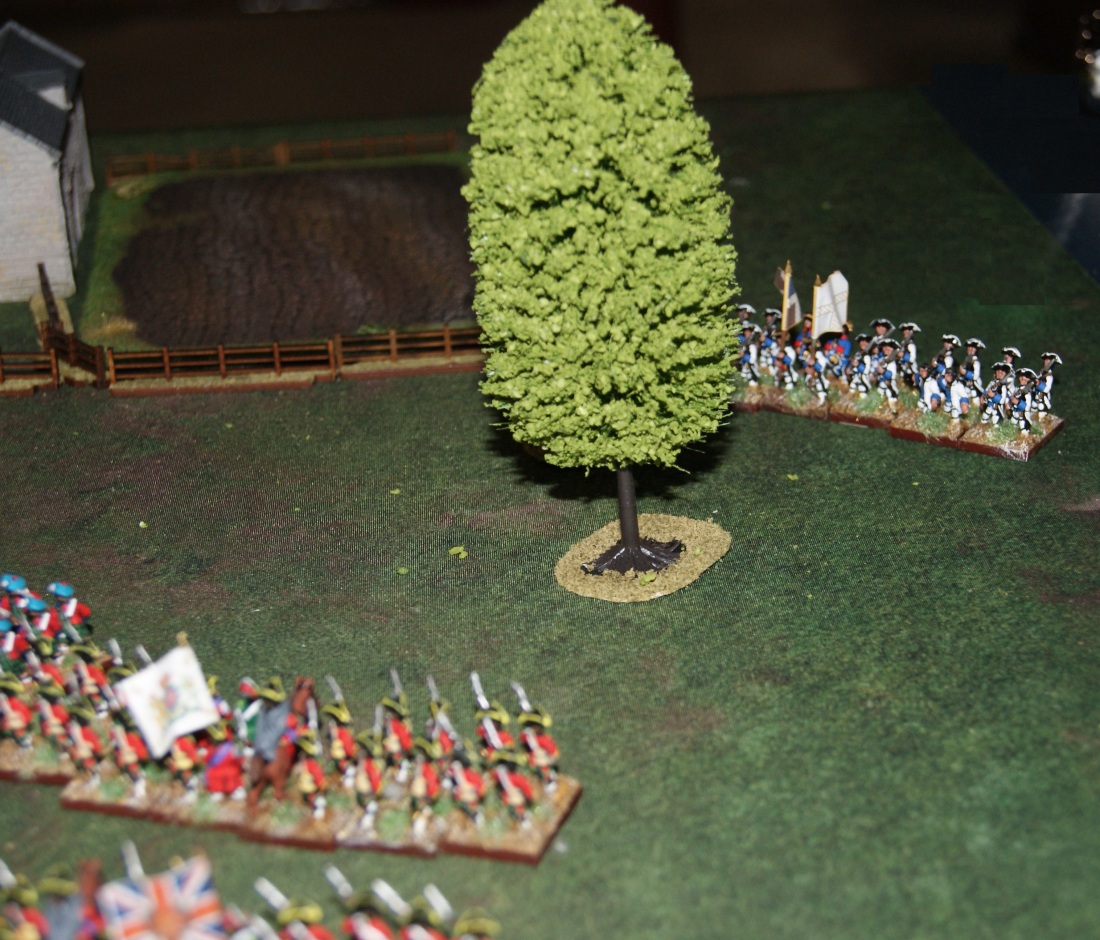
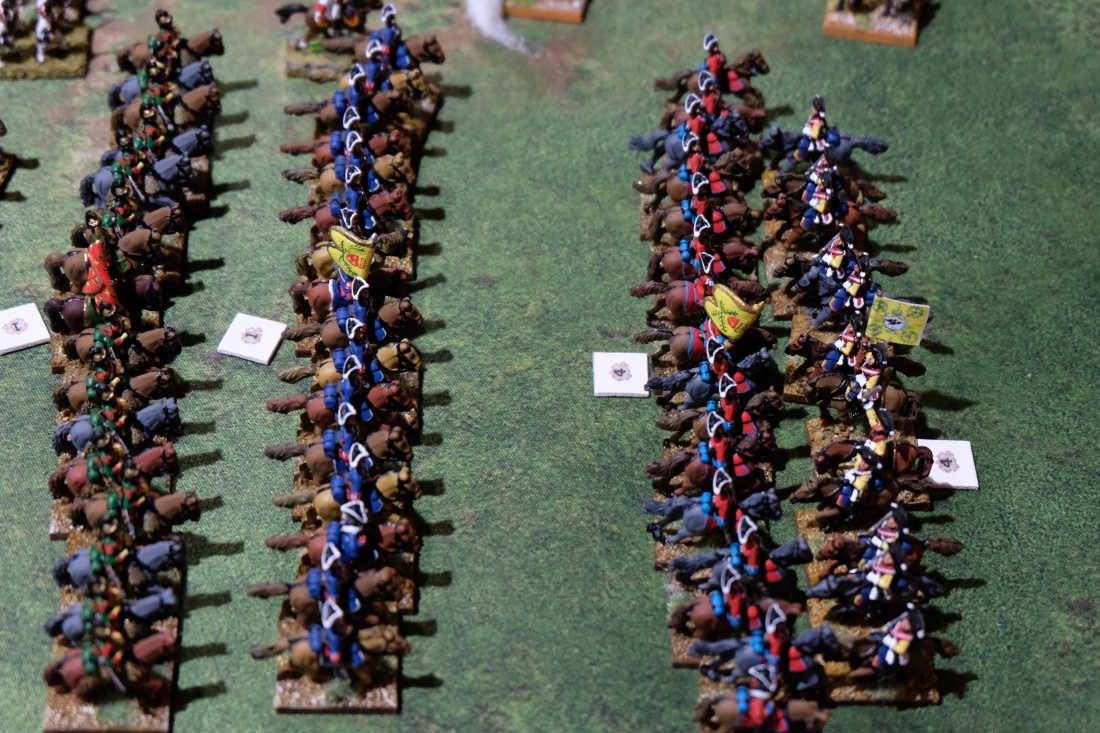
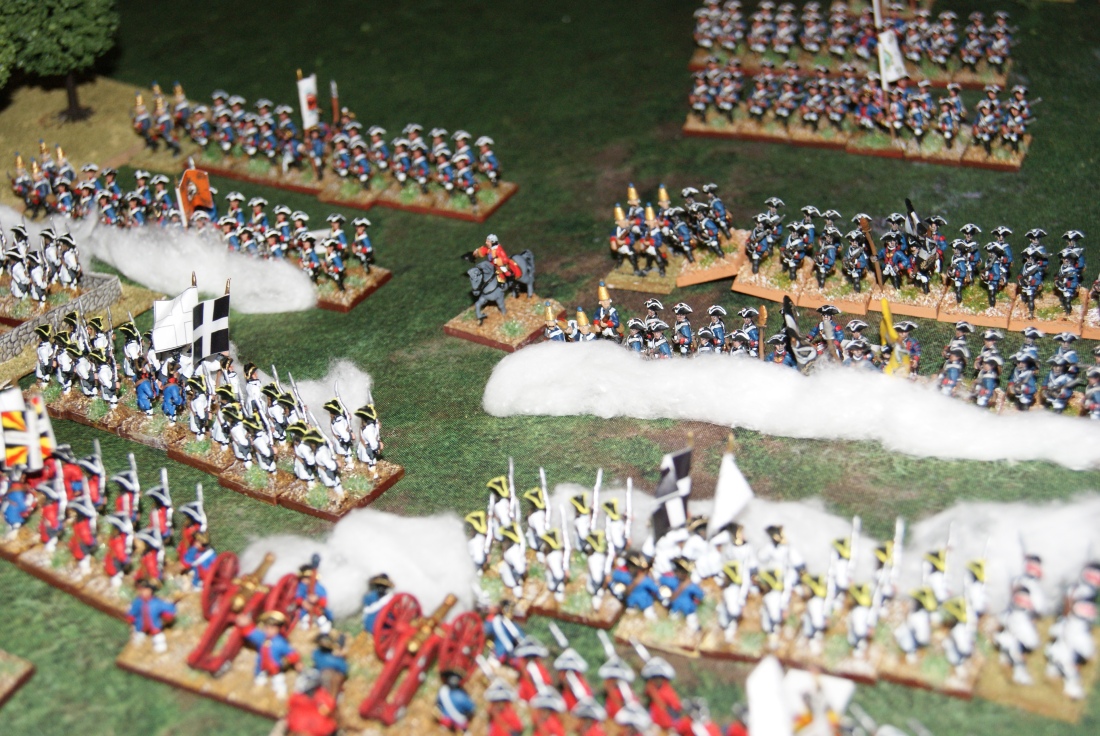
 The Prussian advance as seen from the right flank of the French position.
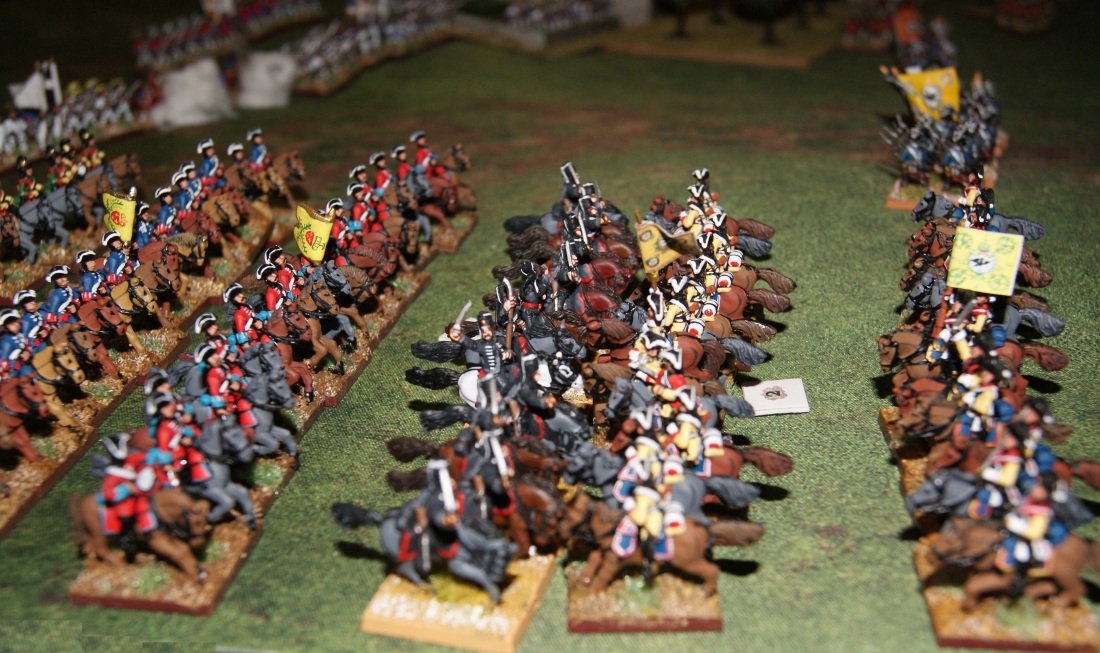
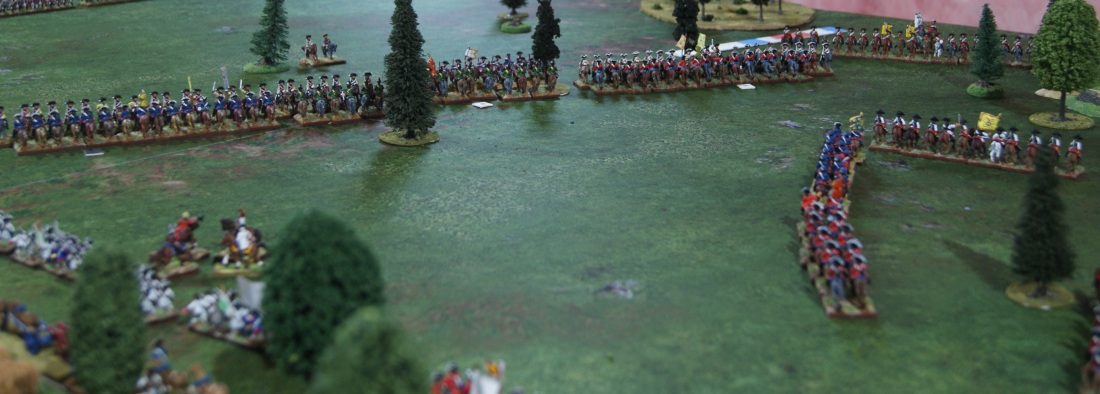
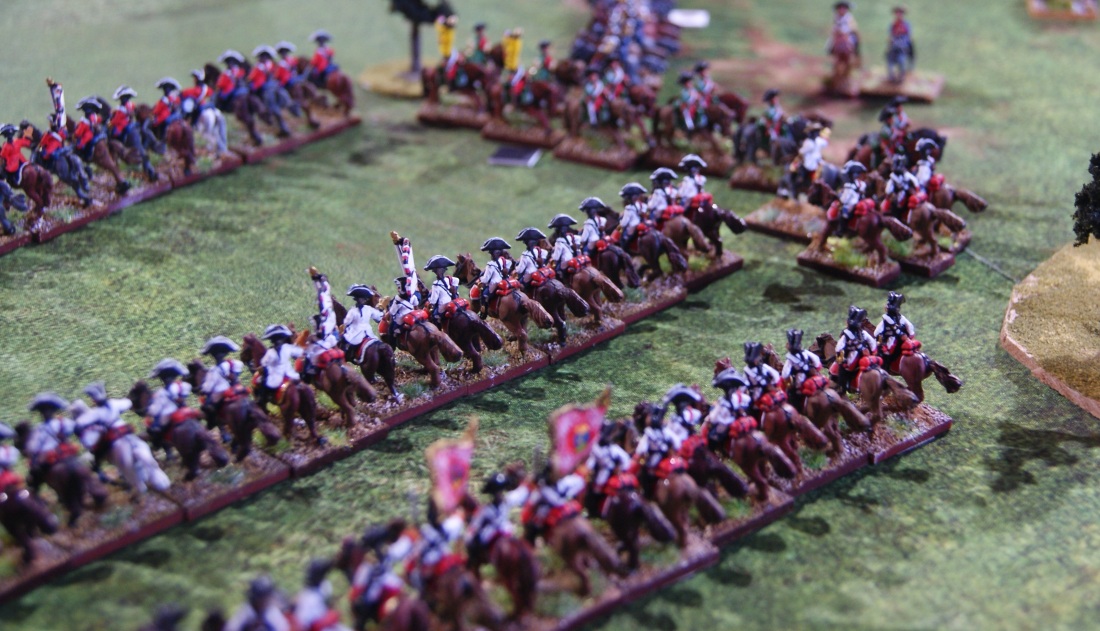
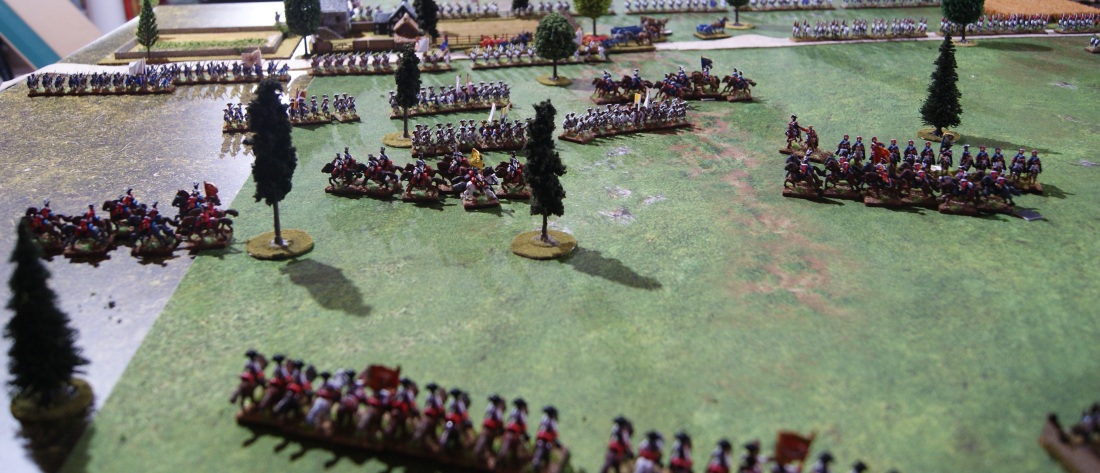
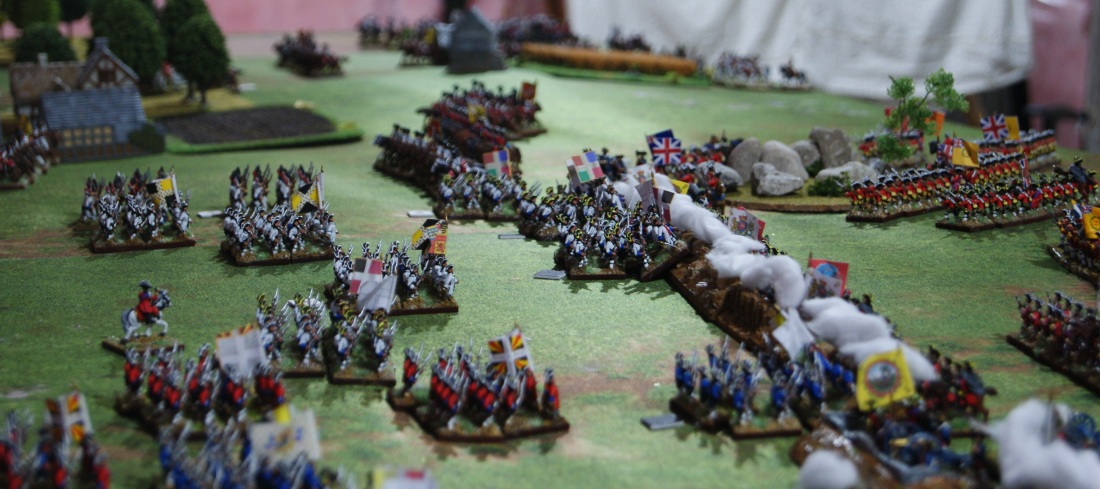
 The cavalry battle, with the infantry fighting it out in the background

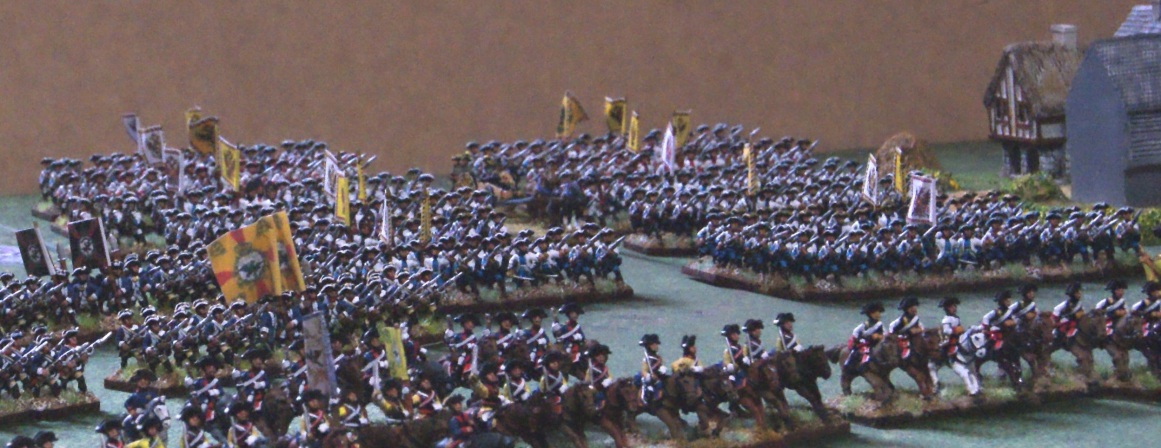
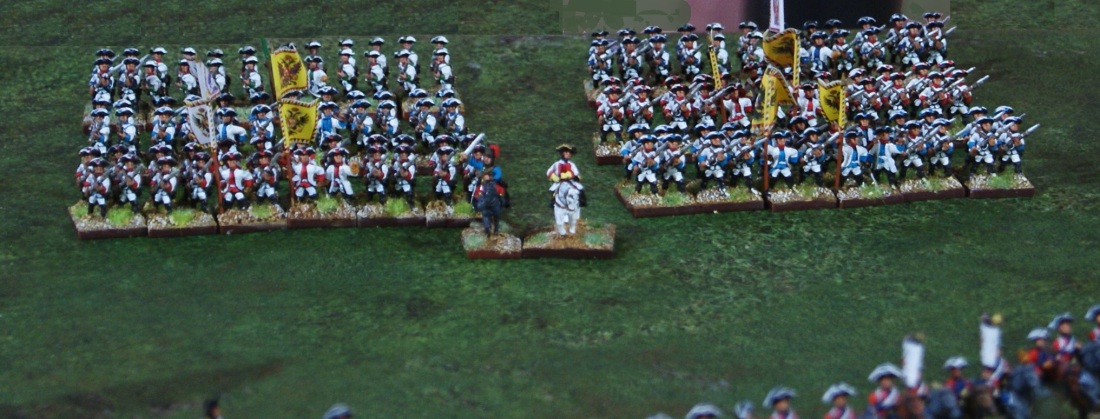
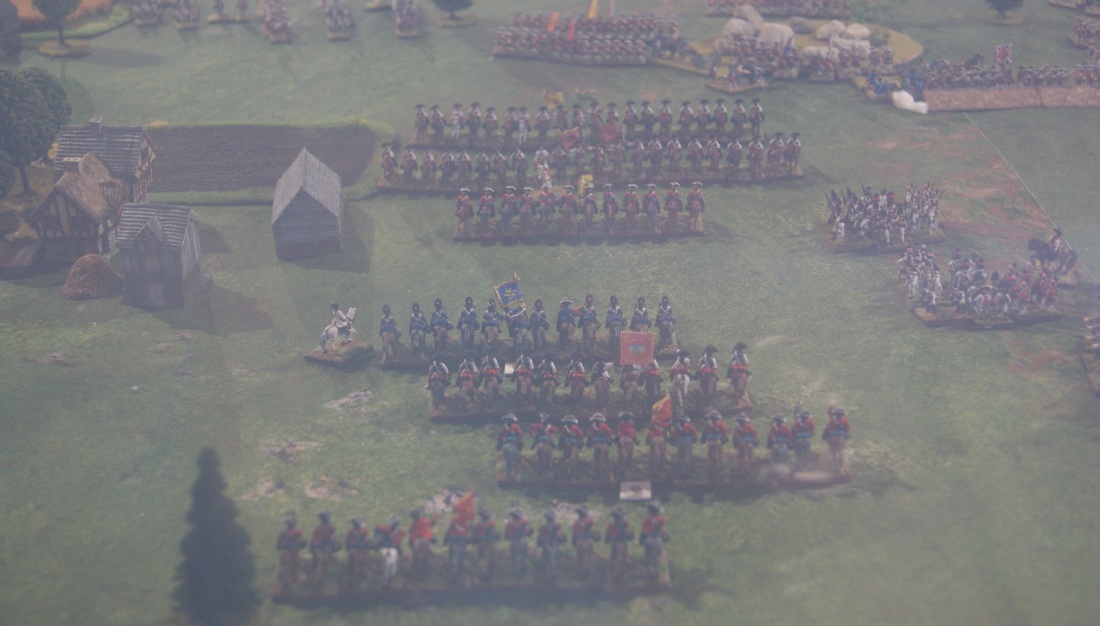
 The Prussians press the attack.
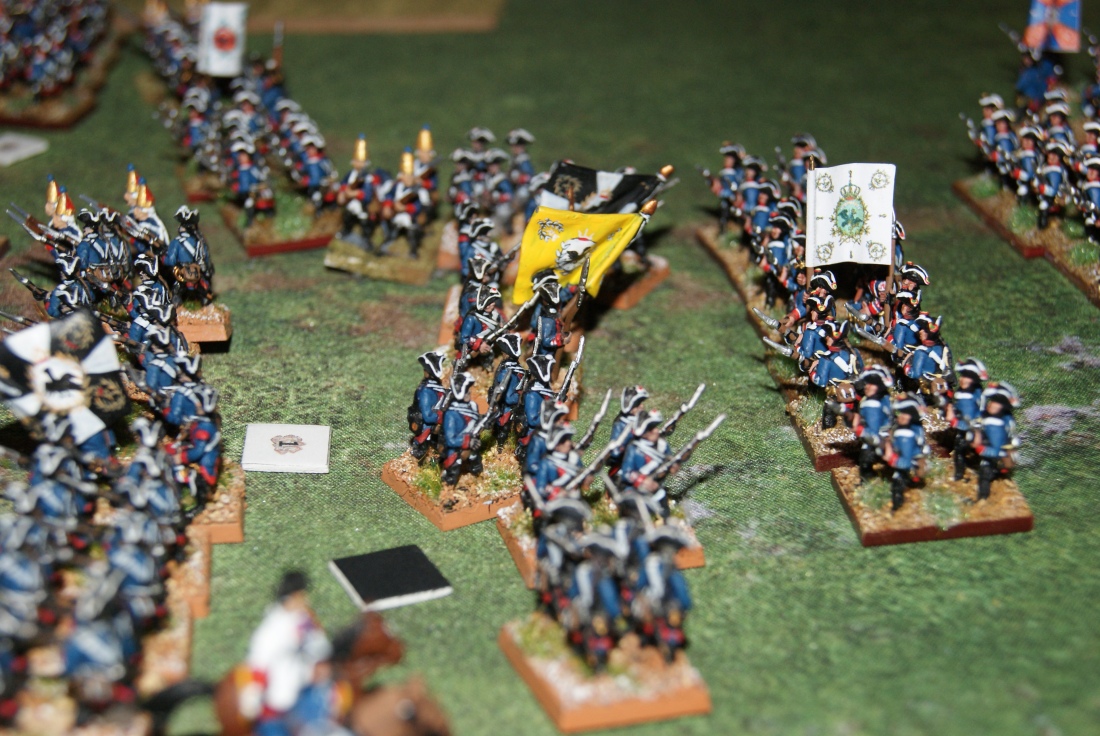 The Prussian front line (facing right) in disorder as it falls back through its comrade battalions.